I originally posted this recipe in December 2007 but it proved so popular at a recent buffet that I make no apologies for re-posting it here.
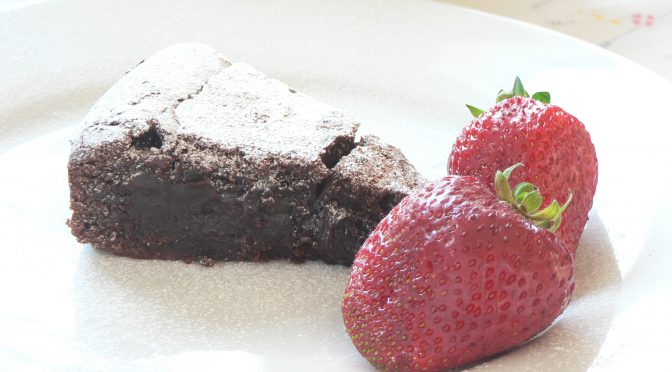
This cake is great! It’s really easy to make and more or less foolproof. It also feeds a fair number, as it is very rich.
Ingredients
3½oz (85g) 70% chocolate (broken up) 12oz (350g) butter (in small chunks) 2oz (60g) cocoa (sieved) 3floz (90ml) boiling water (approx.) 14oz (400g) sugar 3 large eggs 7oz (200g) plain flour
Method
1. Melt butter and chocolate, in a bowl over simmering water. 2. Make a paste of the boiling water and cocoa. Remove the bowl from the water, pour the cocoa mix over the chocolate/butter and mix with an electric mixer. 3. Add the sugar, mix, and then mix in the eggs, one at a time. 4. Add the flour, mix, and then beat it on high speed for 1 minute. 5. Bake at 180C in a buttered and floured 9-inch springform tin, lined on the bottom with parchment. 6. Check after about 30–35 mins. A big crack or two will appear when it is cooked but the cake will still wobble when shaken. Depending on the oven, this may take longer.
To finish
7. Allow to cool for 20 mins – remove from springform (do not turn upside down though until cold as it may leak). 8. Leave until cold before use. The cake should ‘ooze’ chocolate when cut.
It’s quite amazing how certain foods are so local that even though you live in the County bordering those where they’re made you’ve managed to get to 56 years old without ever having them.
The Derbyshire or North Staffordshire oatcake is such a one; it wasn’t until about 6 weeks ago, on a visit to Hartington, that I had tasted my first oatcake. I’ve hardly stopped eating them ever since!
Unlike the biscuit that shares its name, the oatcake is soft. I’ll leave the debate as to whether they’re originally a Staffordshire or Derbyshire specialty to others, but certainly, Stoke on Trent is now its spiritual home. ‘National Oatcake Day’ is celebrated in the area on 8th August, and the local football club’s fanzine is even named after them.
So, what is it? Well, it’s a sort of egg-less oat pancake made with a yeasted batter: a ‘Tunstall’ tortilla’ or ‘Potteries paratha’! The traditional way of eating them is hot, folded over various fillings. The local potteries newspaper, The Sentinel, lists cheese and bacon as the favourite; bacon, cheese and tomato second, and plain cheese, followed by cheese and mushroom, third and fourth. Sausage in various combinations is also popular. The possibilities are endless and include sweet fillings such a vanilla custard and jam.
When I said I’d never tried one, I’d not only never tried them, I’d never even heard of them. It was only the threatened closure of the last oatcake shop selling ‘through the window’ that brought it to my attention. Regrettably, that battle appears to have been lost: Google street map shows the shop derelict and boarded up.
At the time, I thought that I’d get a recipe and make some but with no benchmark to judge by, I wouldn’t have known whether they were anything like authentic. Having now tried them, I’m in a better position to judge; albeit they were the Derbyshire variety: Hartington is at least a mile into Derbyshire from the Staffordshire border! I joke. The ones I tried were definitely the Derbyshire variety, I was near the border in Hartington, but they were from a bakery in Chesterfield.
A quick look on the web and in my cookery books has produced a number of very similar recipes, often with the same recipes being quoted for both the Derbyshire and North Staffordshire varieties; it is, however, generally accepted that the North Staffordshire variety has a higher ratio of liquid to dry ingredients than those from Derbyshire.
The main ingredients are fine oatmeal, flour, yeast, water, milk, salt and sugar. However, within those the there are many variations: different types of flour, using all water, or a mixture of milk and water, the ratio of liquid to dry ingredients, and many more.
Fine oatmeal is not easily obtained, so I used standard porridge oats from the supermarket and ground it in a coffee grinder. I have some medium oatmeal that I’ll grind the same way; it’ll be interesting to see if there’s any difference between the oatcakes.
Here’s the recipe that I used. The ratio of basic ingredients is very similar to both the online and printed recipes that I’ve seen. I settled for a liquid level halfway between the amounts most commonly quoted for Derbyshire and Staffordshire varieties; this gives a medium thickness of oatcake. For thicker ‘Derbyshire’ ones, reduce the liquid to around 700ml, for thinner ‘North Staffordshire’ ones, increase it to around 850 – 900ml.
North Staffordshire or Derbyshire Oatcakes
225gm oatmeal 125gm Plain flour 100gm Wholemeal flour 7gm ‘Instant’ or ‘Easy Blend’ yeast (1 packet) 1 level teaspoon salt 350ml Water (around 37°C) – you may want to add slightly more if you like a thinner pancake. 450ml Semi-skimmed milk (around 37°C)
The recipe is easily adapted for vegans – just replace the milk with more water.
Mix all the dry ingredients together and gradually add the liquids, whisking to form a smooth batter. Leave it for an hour or so in a warm place ’till it there are lots of bubbles on top of it, a warm kitchen’s fine.
Heat a pancake pan, or frying pan, over medium heat until hot. Grease it lightly with oil; I used a non-stick 24cm pancake pan and used an oil spray like this one to give a very fine coating of oil:
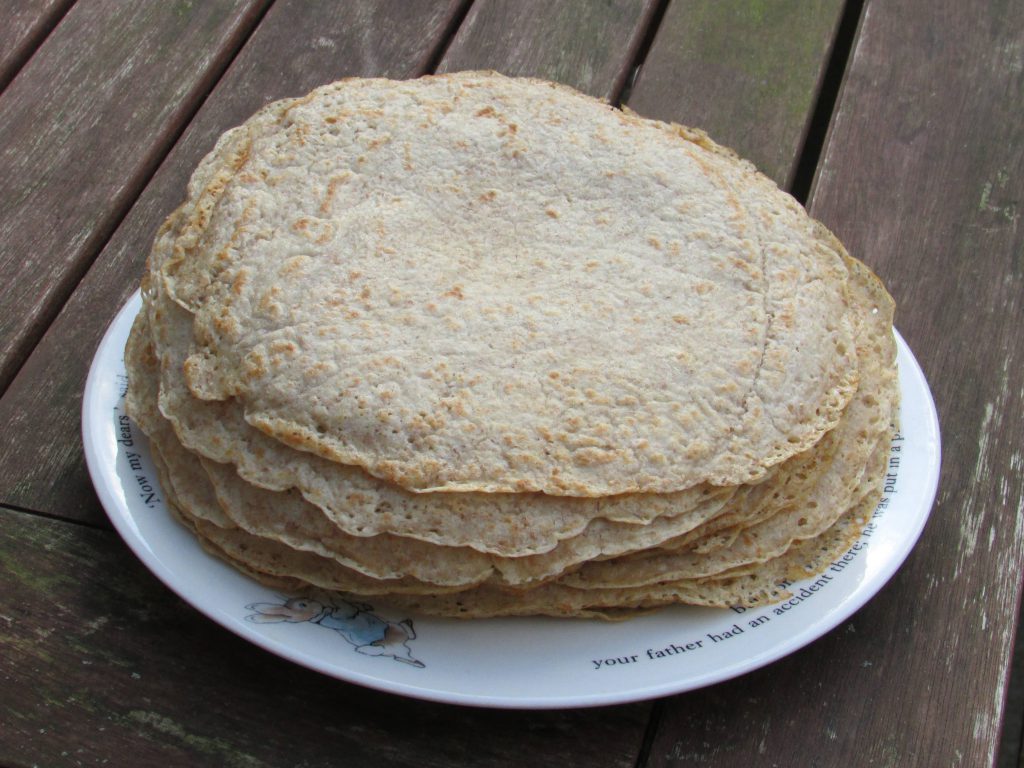
Pour, or ladle, approximately 75-100ml of the batter into the pan tipping the pan to spread it all over. Cook until the top looks dry and it’s golden underneath. Turn it over and cook the other side. Repeat with the rest of the batter; it should make 12-15 oat pancakes.
A word about turning the oatcakes over. I find that by far the easiest way is to toss them. Trying to use a palette knife just results in a batter-wrapped palette knife! If an oatcake lands off-centre, I leave it for about 20-30 seconds before shaking the pan to centre it. This allows the oatcake surface to seal before trying to move it.
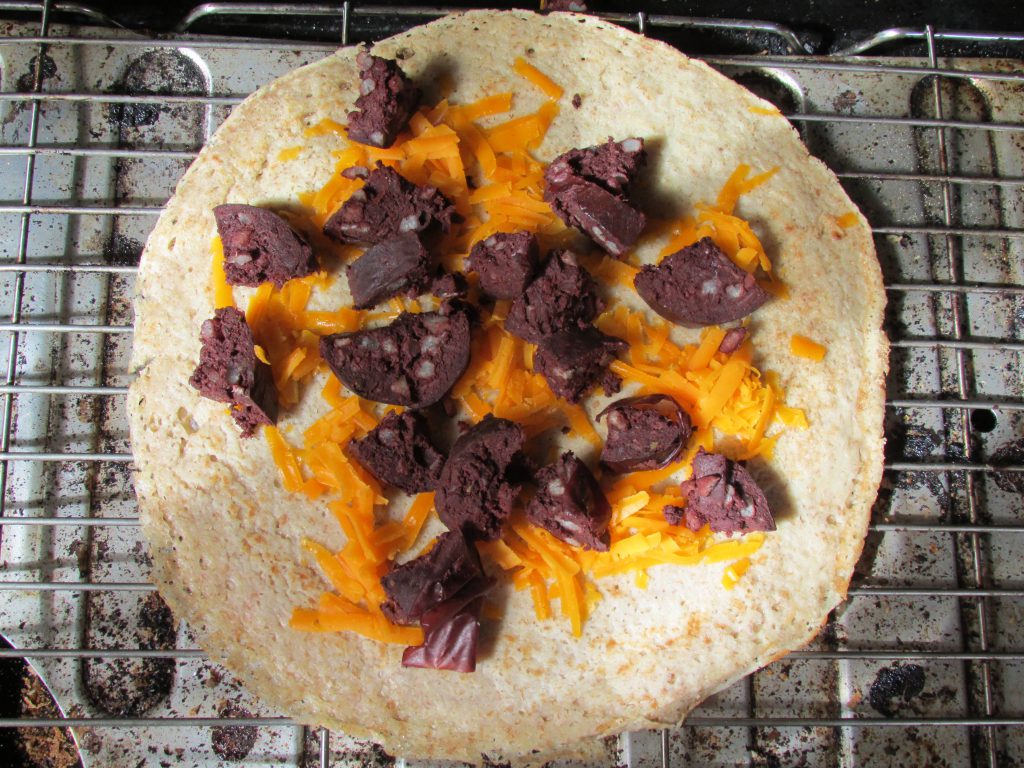
Whilst bacon and cheese is my favourite topping, I really enjoyed a cheese and black pudding one this morning:
It may only have been rat-trap Red Leicester and a mass-market black pudding, but it tasted mighty good!
Here’s a great cheese-related activity to do with a group of school kids that won’t break the bank. Paneer, an Indian vegetarian cheese – or the cheese your granny made out of sour milk!
That said, I’ve only ever made it from non-homogenised milk, which works out a tad expensive ‘cos those large cheap plastic containers of milk in the supermarkets are invariably homogenised.
Ah well, nothing ventured, nothing gained: the investment of a whole £1 coin got me 2 litres of ALDI’s best full-fat milk.
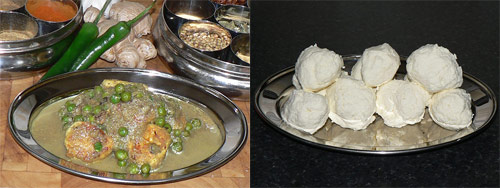
To make the cheese is simplicity itself: put the milk into a pan and bring it to the boil stirring regularly so that the milk doesn’t stick to the bottom of the pan. Just before it boils (or at least when it’s over 80°C) add a couple of lemons worth of lemon juice or about the same amount of white vinegar. Give it a quick stir then leave it for a couple of minutes or so. The milk should split into white curds and a watery light-green/yellow/clear whey. If it hasn’t, boil it back up and add some more lemon or vinegar. Pour the whole lot into a cloth-lined colander and run it under cold water to cool it, then leave it to drain:
…you can save the whey to use in scones or soda bread if you want.
That’s basically it – you can go on to wrap the cheese up and press it (I did, under a stone mortar). You can add salt, herbs, spices etc to it or you can even use it for sweet puddings or have it dribbled with honey. If you press it for a couple or three hours, you can cube it or mould it into balls. Then, unlike virtually all other cheeses, it will fry without melting; it’s great in the Indian dish of peas and cheese – Mattar Paneer (Panir).
I thought I’d have a go at making a ‘burger type’ soft roll, minus the sesame seed ‘cos I’ve run out!
Time has moved on since I first made these rolls in June 2008. The recipe’s changed slightly. Rather than confuse things with a new article, I’ve amended the recipe below.
Ingredients for 9 large or 12 smaller rolls: 600g Strong Bread Flour 120ml Hot Water mixed with: 300ml Cold semi-skimmed milk (you want the total liquid to be about 35 – 37°C when you add it) 1½ teasp Salt 2 tablespoons Cooking Oil 1 sachet Fast Action Dried Yeast (7g)
Method
I make this using a Kenwood food mixer. But it’s easily amended to make it by hand.
I put the flour into the bowl, then chuck the salt in and mix it with a spoon. Then I add the yeast and mix it again. Next, I add the oil and water/milk and stir it with a spoon until the ingredients are roughly mixed together. This is for no other reason than to stop the flour splattering everywhere when I turn the mixer on!
I mix it on a low setting using the dough hook for five minutes then I give it a rest for a few minutes and then mix it again for another 5 minutes. I tip/scrape the dough onto a floured board and bring it together into a ball using as little flour as possible. Into the now empty bowl, I put about 1 teaspoon of oil, put the dough back in, and rub it with the oil. I cover the bowl with a tea towel and forget about it for an hour or so.
A word about the dough: This dough has a ratio of 70% water to flour which is higher than many ‘traditional’ recipes. It makes a lighter textured bread which most people nowadays prefer. You could make it by hand if you want to but be warned, this mix is very sticky! If you do make it by hand, persevere when you knead it and try not to add too much extra flour; just accept that your hands will be a sticky mess and get on with it. Knead it for a good 10 minutes until it is a nice ‘silky’ texture. Don’t try and cheat at this stage or it won’t be any good at all.
Rising the Dough: Recipes generally tell you to leave the dough in a warm place, an airing cupboard, or something similar, for about an hour, until doubled in size. It may take an hour. It may take longer. What I do is judge by the size, not time. Ideally, the temperature should be about 26°C but I generally just put it to one side in the warm kitchen. As long as it’s above 4°C the yeast will still be active; mind you, at that temperature you’d be starving by the time the bread rose and was baked!
When I say “doubled in size”, I mean doubled in size:
Shaping and proving the dough Now for my favourite bit – just shove your fist into the middle of the dough. Yes, I mean it – just thump it in the middle. It’ll collapse making you wonder why you bothered leaving it to rise in the first place! It’s necessary, so just enjoy it!
Tip the whole lot onto a floured surface and work it around for 30 seconds or so, then shape it into a ball. Cut this into 12 even parts for small rolls, or nine for larger rolls for burgers. I flatten each piece out and fold the sides into the middle tensioning the under-side as I work around each piece. When the under-side is smooth and ‘tight’ I turn it over and push it down to make a flat disk with a smooth top.
I then sieve some flour over the top. Alternatively, you could brush it with water and put sesame seeds, poppy seeds, or something similar on top.
I leave the dough now to rise again. When it’s about half risen I put the oven on 180°C (160°C fan) to warm up. Many old recipes give a time for the dough to rise – say 20 minutes – what nonsense! Sometimes it’s fairly quick, other times it may be an hour or so. What we want is for it to nearly reach its full size – the bigger the better – as long as it doesn’t collapse! The pictured dough is of the smaller rolls after they’ve risen:
Cooking the bread For a soft roll, I bake the bread at 180°C in a ‘non-fan’ oven; it works far better than a fan oven for soft rolls. I then cook them for 20 minutes and, if when I tap the bottom of the loaf it sounds hollow, it’s cooked. If you only have a fan oven, it’s hard to keep them really soft; it helps to cook them at a lower temperature, maybe 170°C or even 160°C, and to wrap them in a clean tea towel immediately after cooking.
These rolls are very light, have good keeping qualities, and freeze well.
For a crustier roll, have the oven at 220°C (200°C fan) and put a metal tray into the oven as it warms up. Immediately after you’ve put the bread rolls in to cook, put some water, say 150ml, onto the very hot tray to create a steamy atmosphere. Remove the water tray after 10 minutes.
The crustier rolls are best eaten on the day of cooking.