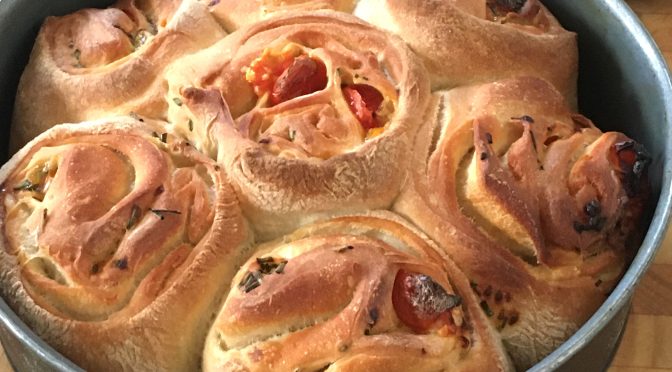
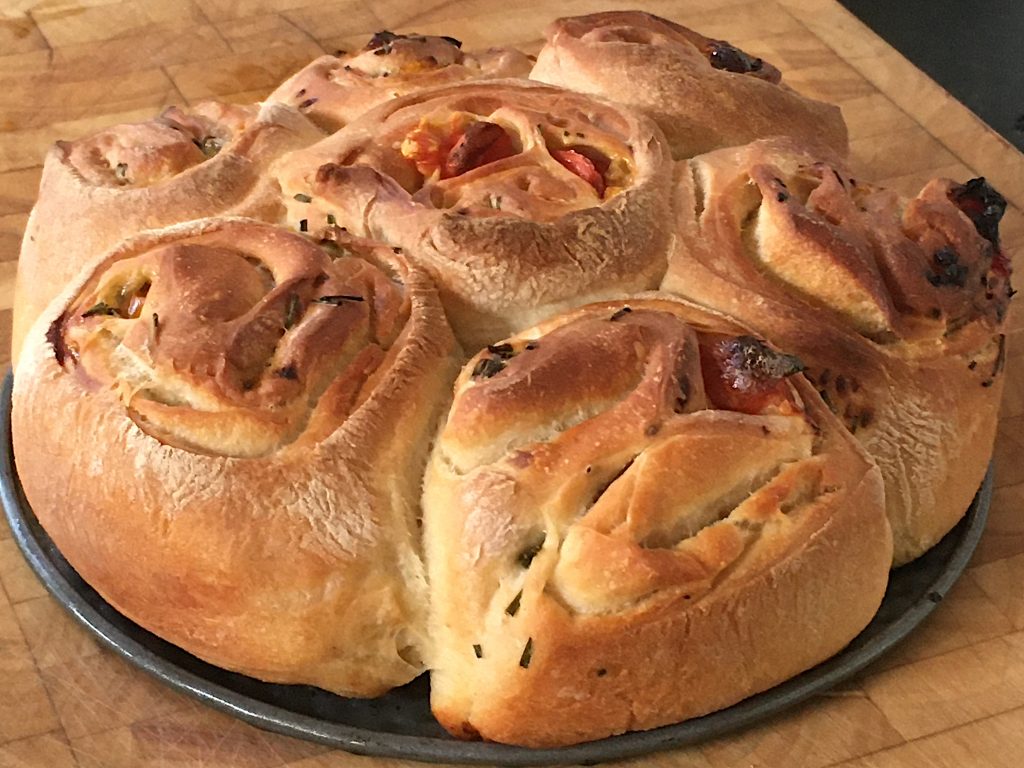
We have a small garden and grow tomatoes every summer. They taste so much better than shop-bought. We’ve got a few too many at the moment and as we’re out of bread it made sense to try and kill two birds with one stone. I was thinking along the lines of focaccia but then thought I’d have a play.
Mum and Dad celebrated their Diamond (60th) Wedding Anniversary in 2014. As well as sending them to a local restaurant for a meal, we decided to have an afternoon tea.
For me, afternoon tea is lots of small patisserie and cake items; oh, and some token sandwiches beforehand. I’m not one for scones and cream as part of ‘afternoon tea’; they’re for other occasions when they can be enjoyed on their own. Now, we’re not ‘The Savoy’, or even ‘The Great British Bake Off’, so I choose just a small selection of simple things: individual lemon meringue pies, fruit tarts, and meringues, along with cupcakes made by my daughter Hannah. The meringue uses up the egg whites left after the yolks have been used for the pastry and lemon meringue filling. Savouries were cucumber, egg, ham, and cheese sandwiches, some even had the crusts cut off!
‘Ere, how come when it’s lemon meringue it’s a pie, but when it’s fruit, it’s a tart?
Never mind, what I do know is that with pies or tarts, it’s all about the pastry – it needs to be strong enough not to fall apart but melt-in-the-mouth when you eat it. My method may not be the proper way but it works and results in a pastry case that’s more like shortbread than pastry.
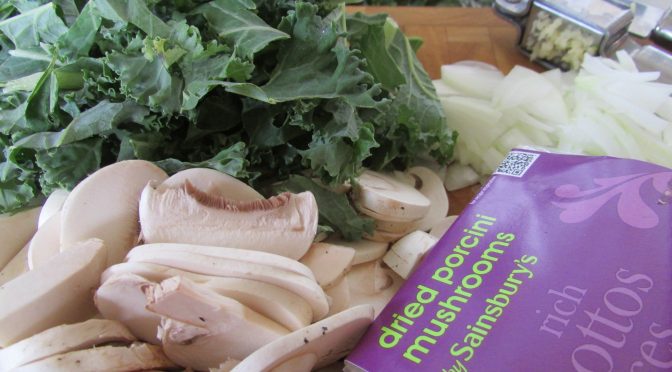
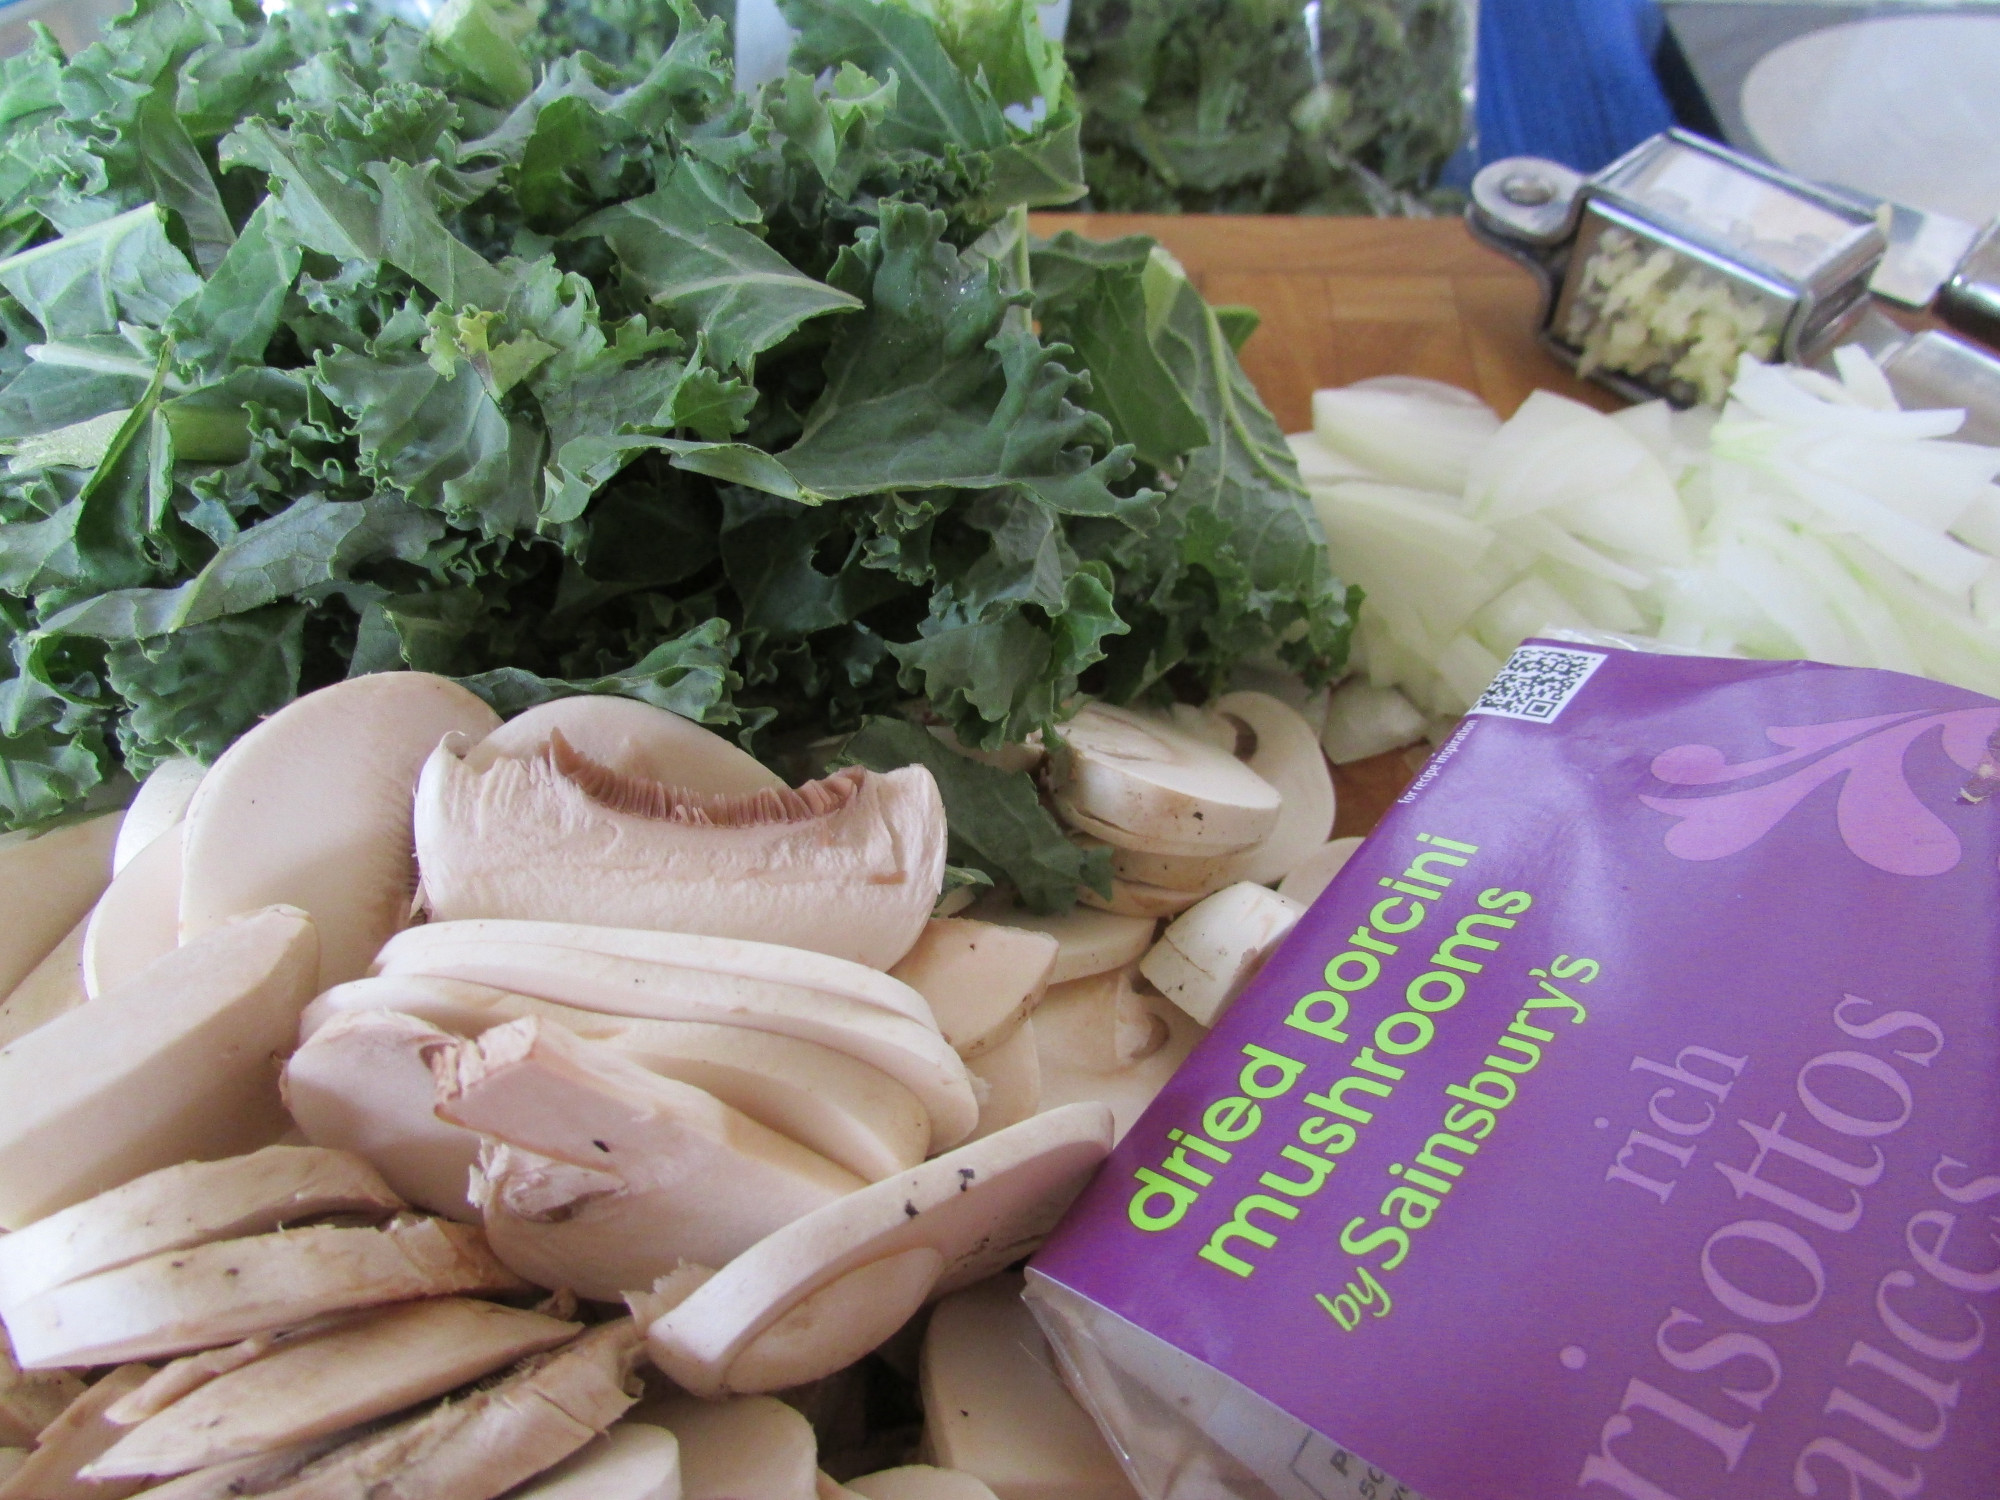
I’ve never been really happy with using water instead of stock for vegetarian soup but vegetable stock powder invariably gives a celery flavour to the whole soup and to be honest, even when I’ve made vegetable stock I’ve never been really happy with it.
However, I think that I’ve found the answer, at least for mushroom soups. Dried Porcini absolutely transforms them. I’d never bothered with it until now because of the price. But recently I’ve been looking for things that help to lower my calorie intake and have been surprised, it’s not always the lower-calorie items that are best. For example, you get far more ‘bang for your buck’ from high-calorie Stilton than a reduced calorie cheese. Just try it, tiny pieces of stilton will add flavour whereas you’d need double the amount of a lower-calorie product. Well, when I was thinking along these lines, I also realised that the same applies to using very small amounts of expensive items and there’s no doubt that Porcini is expensive: £60 – £80 per kilo but if you only use 10gm it’s only 60p or about 10p per bowl.
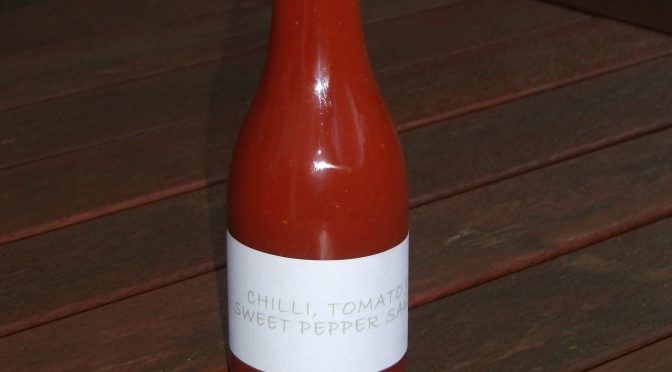
As long ago as 2007 I wrote about a chilli dipping sauce. I still use that recipe; it’s so quick to make.
This one is a proper sauce – as in not a thin dipping sauce. I’ve added red pepper to it as not everybody likes a sauce that grabs you by the throat. Feel free to reduce the red pepper and increase the chilli or add a couple of scotch bonnets.
1 dessertspoon Cornflour (Cornstarch) a little water Salt to taste ¼ teaspoon is a good starting point
Weigh the sugar and set it aside. Then weigh the water and apple cider vinegar and place them into a pan with everything but the sugar, cornflour and salt. Cook the mixture in the pan until the pepper and chilli are nearly soft. Add the sugar and bring it back to a boil. Mix a little water into the cornflour to make a loose paste. Add it to the pan whilst stirring – thicken it to the consistency you like – you may not need it all. Let it cool a bit and then taste and season it.
in 2007, I wrote about making a simple sweet chilli dipping sauce:
Apparently, it’s National Chilli Week from 26th November to 3 December 2007.
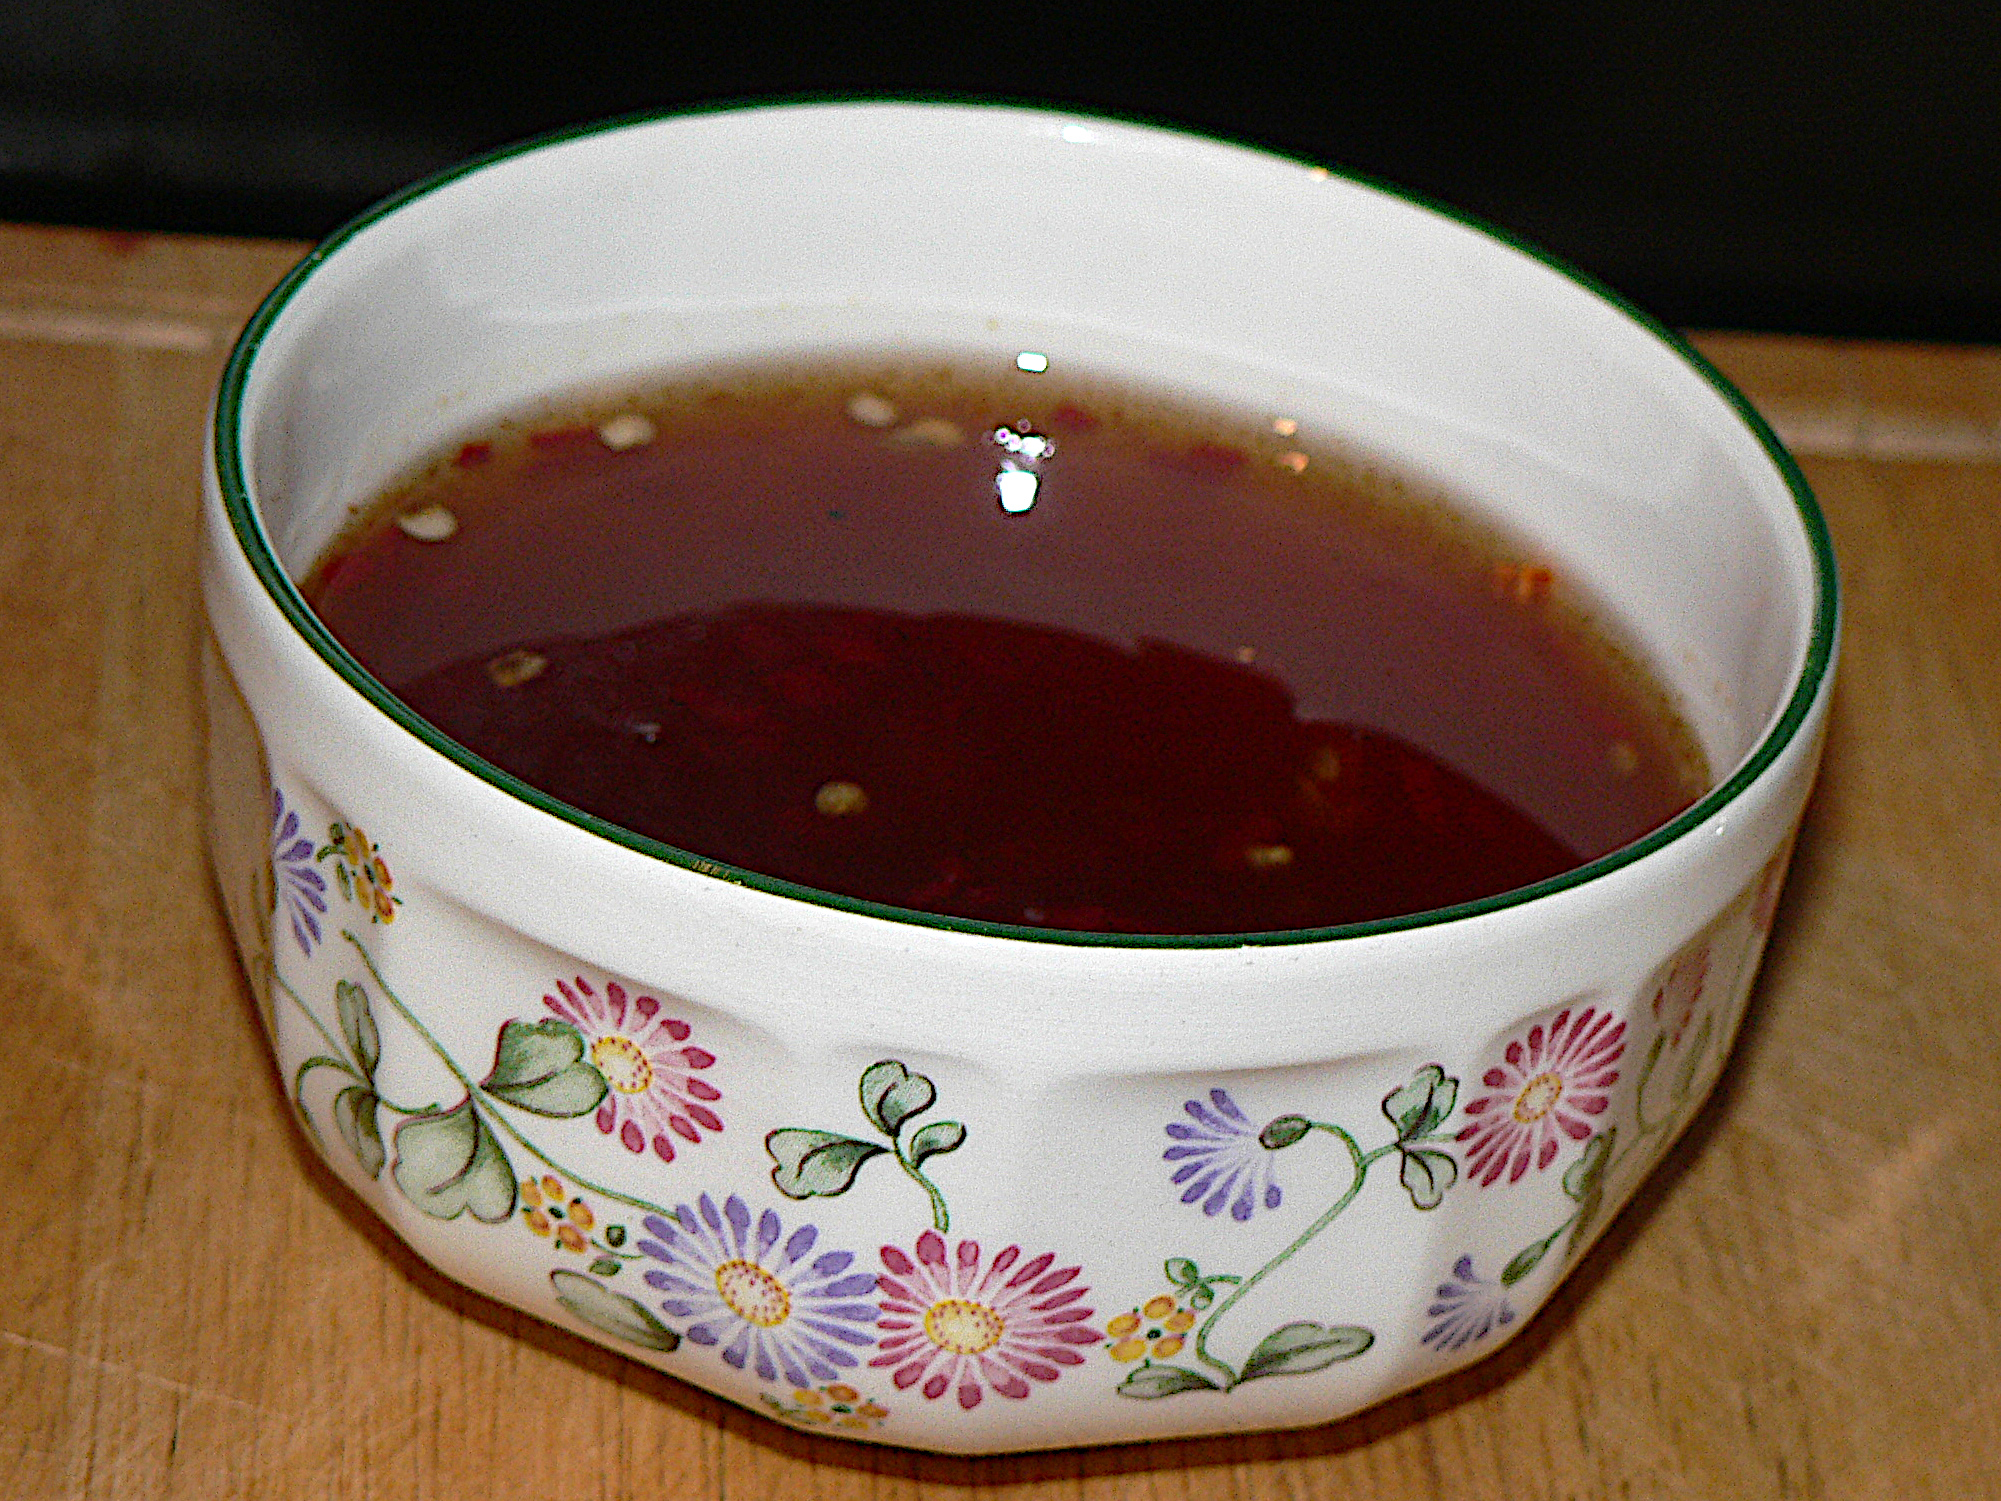
It’s a bit of a coincidence really, ‘cos on Saturday I experimented with making my own Sweet Chilli Sauce
I put about ½ cup sugar in a pan with ¼ cup water and ¼ cup vinegar. I added a finely chopped chilli and boiled it all for about 5 mins or so. This gave me a light dipping sauce with the chilli floating on top. I wanted the chilli mixed in the sauce and slightly more heat so I thickened it with arrowroot and added, in the absence of another fresh chilli, a bit of chilli powder. I also added some paprika (about ¼ teaspoon) for colour.
The sauce is better than I expected – It’s just like the stuff you buy.
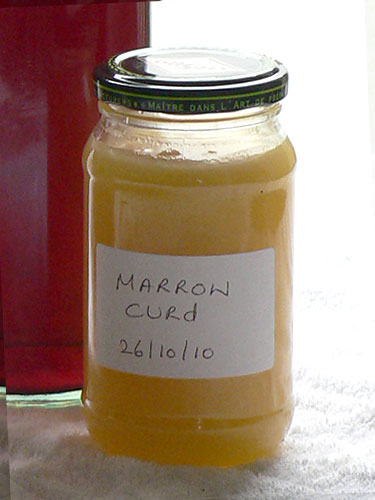
My grandma Young used to do a lot of fruit bottling and jam making; I suppose everyone who had fruit trees did in those days as they didn’t have freezers or even a fridge in grandma’s case. She used to make a jam that she called Marrow Cream; it was very much like lemon curd. I’ve since learned that it’s more commonly called marrow curd.
Poor old marrow curd, it’s a superb lemony concoction that’s up there with the best of them but has nothing going for it in the name stakes, does it? So for everyone’s benefit, I’ve renamed it Autumn Curd. Of course, a good PR man would also double or treble the price to make it even more attractive but as you’ll make your own, this doesn’t really apply!
I couldn’t find Grandma Young’s recipe, but this one seemed very similar.
I’ve amended it slightly to make it more like the jam I remember:
The ingredients: 2½ lb cooked marrow flesh (about 3½lb before cooking) 2 – 2½ lb sugar (depending on how sweet you like things!) Juice and grated rind of 4 large lemons 6 oz butter
Method: Steam the marrow until soft. Leave it to drain in a sieve or colander squeezing as much of the liquid out as possible. Mash or liquidise it and squeeze again. Place it into a pan with the sugar and heat gently until the sugar has dissolved. Add the lemon juice and grated rind then the butter. When the butter has melted, bring it all to a rolling simmer, stirring to prevent sticking. Simmer it until thick – about 5 – 10 minutes and then bottle it into sterilised jars.
I tasted some of this warm and it was superb. On cooling, I found it to be very sweet. I’ll maybe add more marrow and lemon or less sugar next time. That said, it’s still bloomin’ good.
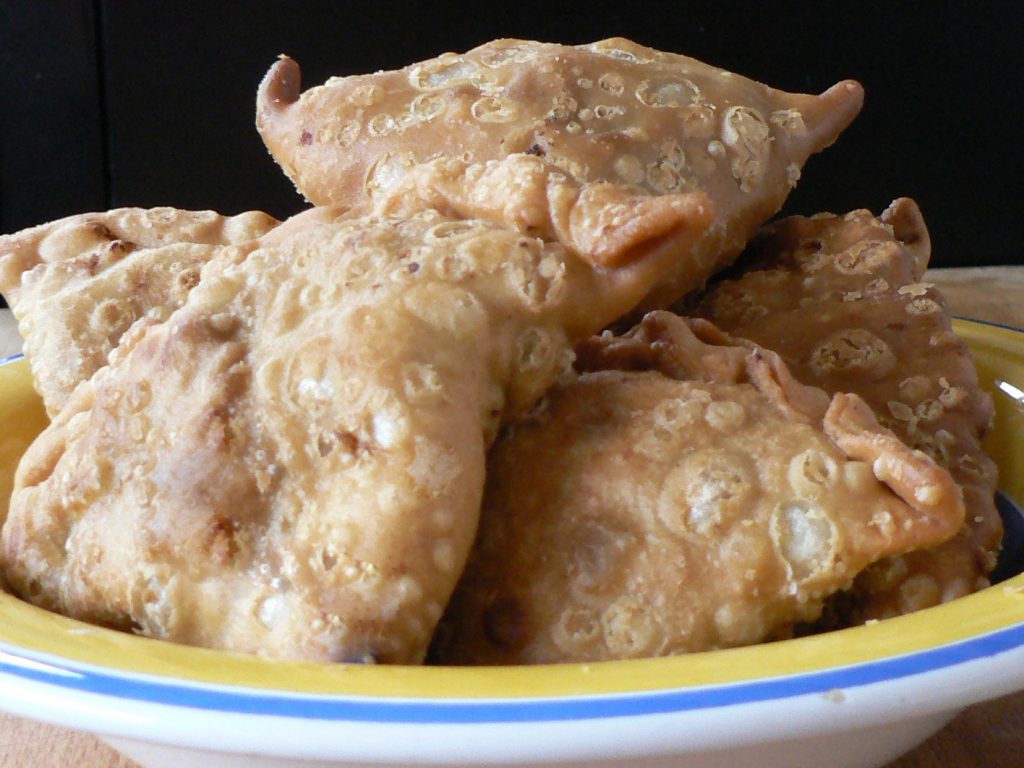
A friend brought me some samosas from a shop on Green Lane Road, Leicester to try and they are superb. Mind you, the tamarind dip which accompanied them about blew my brains out!
I’ve made my own samosas in the past using a combination of recipes from Madhur Jaffrey and Pat Chapman of the Curry Club. I’ve been pleased with the results and far prefer the homemade pastry to that on many of the bought ones. They take time though as rolling the pastry and making cone shapes and then filling them is a bit fiddly.
It’s best to make the filling well in advance to give it time to go completely cold.
Ingredients For filling: 1½ lb boiled potatoes A good handful of frozen peas – cooked 1 small onion finely chopped 1 or 2 (or more) small green chillis finely chopped 1 tablespoon grated ginger 1 heaped teaspoon ground coriander 1 heaped teaspoon ground roasted cumin seeds 1 heaped teaspoon garam masala chilli powder to taste 1½ teaspoon salt 2 tablespoons lemon juice
For Pastry: 12 oz plain flour ¾ teaspoon salt 5 tablespoons cooking oil 5 tablespoons (approx) water
Filling: Fry the onion until soft in about 3 tablespoons of cooking oil, chop the peas up a bit and add them along with the rest of the ingredients except the lemon juice. Mash the potatoes up a bit in the pan and mix everything together well – add a touch of water if it seems too dry, but only a couple of tablespoons or so. Cook for about 5 minutes.
Add the lemon juice and adjust the seasoning to taste with salt and/or lemon juice.
Pastry: Mix flour and salt, rub in the oil and then add enough water and mix to a stiff dough. Knead for about 10 minutes. Mould into a ball and rub with a tiny amount of oil, wrap and put aside in a cool place.
Assembly: Make a loose paste of about 1 tablespoon of flour with water – this is used to seal the pastry. Divide the pastry into 8 pieces and roll out each very thinly into a 7 – 8 inch circle. Cut a circle using a 7-inch plate/pie tin as a template and then cut each circle in half.
Form cones from each semi-circle of pastry overlapping the edges by about ½ inch at the top and sealing them well using either a drop of water or a small amount of the paste made earlier.
Fill the cones with about 2½ teaspoons of the filling mix. Seal the tops well using the water/paste and crimp if you want to.
Deep fry slowly at about 170°C turning them frequently until nicely brown. Drain, leave to cool a bit, then enjoy on their own or with a dipping sauce of your choice!
I always intend to prepare for Christmas in plenty of time, but it never seems to happen! One thing I do like to make is my own sausage rolls. There is no comparison between a homemade sausage roll, made with good (home-made) sausage meat and the awful frozen sludge-filled offerings at the supermarket. Uncooked commercially produced sausage rolls only need to have a 6% meat content!
For sausage rolls I make a quick rough puff pastry:
Ingredients 250gm Plain Flour Pinch of Salt 125gm Butter 125gm Lard or Vegetarian Fat 135gm Cold Water A small squeeze of Lemon Juice
Method
Put the flour and salt in a food processor.
Cut butter into 4 pieces, put 3 on a plate and 1 in the flour. Do the same with the Lard.
Soften the butter on the plate in a microwave using the defrost setting. Do the same with the Lard.
Add the water and lemon to the food processor and mix to a dough.
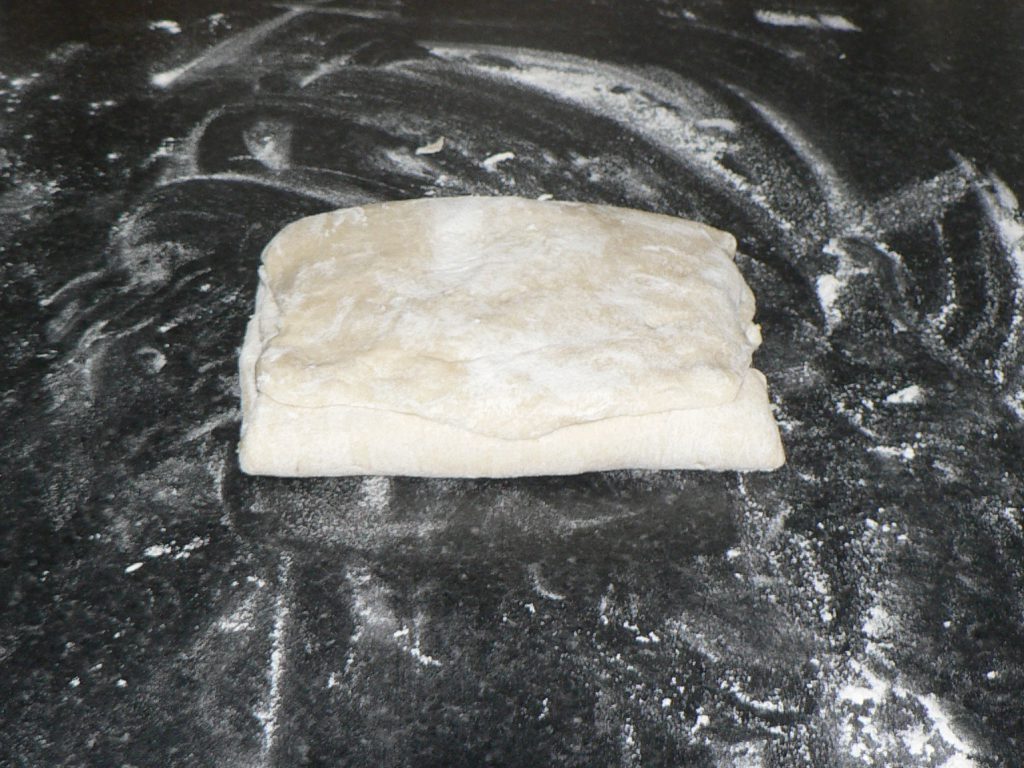
Roll the dough out on a floured board into a rectangle about 3 times as long as it is wide (see photo)
Spread the top two-thirds of the rectangle with one portion of both the butter and lard – just like buttering bread.
Fold the un-buttered bottom third up.
And then the top third down.
Turn the pastry ¼ turn.
Roll the dough back out to the size it was originally and repeat the above twice with the other two portions of lard and butter. Then, repeat it one more time without adding any fat. You’ll end up with something like this:
I’m freezing this for later use as I need to make some more sausage meat. Had I have been organised, I would have had the fresh sausage meat ready so I could have frozen the completed sausage rolls ready for cooking.
Now I know if I call this recipe a Chelsea Bun, someone will come along and say, “Oh, no it’s not, a Chelsea bun is made with currants, lemon zest, or whatever and glazed with the milk of a particular species of Yak, only found on one lost island in Battersea Park!” Hence the ‘ish’ in the title!
I made these a couple of weeks ago from a recipe in Prue Leith and Caroline Waldegrave’s Cookery Bible but wasn’t 100% happy with them. Here’s my take on the recipe, it still needs fine tweaking. I think that it probably needs more liquid.
Filling 55gm butter 55gm sugar – plus a bit for tops 80gm raisins – soaked in tea or booze until plump 80gm sultanas – soaked in tea or booze until plump
To finish Apricot or another glaze.
Method Put the fruit to soak in sweet cold black tea, or any other fine beverage of choice – brandy would be good.
Melt the butter for the dough (only just get it really soft – not frying temperature). Put all the dough ingredients in a food mixer bowl and, using the dough hook, kneed for 10 minutes – it’ll probably be very sticky!.
Shape into a ball on a well-floured surface, return to the bowl, cover, and leave to rise until doubled in size.
Mix (cream) the butter and sugar for the filling together. I may add some cinnamon to it next time.
When the dough has risen, roll it out to a rectangle about 12″ (30cm) wide by as long as you can get it, maybe 16″ (40cm) if you’re lucky.
Spread the dough with the butter/sugar mix and spread the (well drained) fruit in a layer over it leaving the last ½” (1cm) uncovered. Roll the dough up into a ‘swiss roll’ and cut into 12-16 slices.
Put oven to heat on 180°C (350°F).
Place the coils of dough, laid flat, about ¼”-½” (about 10mm) apart in a roasting tin. Leave to rise until doubled in size and all pushing against each other.
Sprinkle with sugar and cook for about 20-25 minutes (the time will vary depending on the oven). Check after 10 minutes and, if they are going very brown, cover loosely with foil.
Cool and glaze with apricot glaze or any other glaze of your choice.
Enjoy!
I fancy varying the recipe next time and using chocolate chips and pieces of pear instead of the dried fruit.
This time of year is great for picking up double cream that’s near its sell-by date from the Supermarket. Just after Easter or Wimbledon are also good times.
I make butter using my Kenwood mixer, you could also use an electric whisk, or even make it by hand.
I put the cream in the mixer with a pinch of salt and a small pinch of sugar for every 300ml. I’ve no idea why I use the sugar; it’s just that I saw a lady who had made the butter for Chatsworth house for about 50 years do it. Who am I to argue with her experience?
Using the K beater on the mixer, start ‘churning’ the cream
Nearly there!
If you don’t have a bowl cover use a tea towel, or when it ‘turns’ it will splatter everywhere:
Turn it off quickly when you hear the butter slopping around in the butter milk.
Now the important bit, rinse and work the butter in very cold water to get rid of as much of the milky stuff in the butter as you can, then put it onto a board and pat (beat) it – water will come out of it. I don’t have butter pats so use my hands and a rolling pin.
I flatten it, then roll it like a Swiss roll to shape it.
You can see from the photo that it needs more work to extract water – I’m going to be using it quickly so it’s not so important. This butter will freeze well, so there’s no excuse for not making plenty.
The taste reminds me of the creamy Normandy butter you get in France. It’s far better than shop-bought and for about half the price. You also get the buttermilk, which makes great scones or can be used to dip chicken into before coating in breadcrumbs or flour when making fried chicken.