Bacon and Cheese Quiche

There you go, I’m being posh and calling it quiche! It’s really a good old bacon and cheese flan. It’s a pity that so many poor imitations of this superb rich savoury egg custard are sold by supermarkets and presented to the world on numerous buffets with cheap frozen sausage rolls and those damn miniature scotch eggs.

A good quiche is all about the quality of the ingredients, there’s few of them, so they all count. Use good dry-cured bacon (mild smoked if you like), good eggs, double cream not milk, and you won’t go far wrong. One other thing, and a very important one, is that most recipes (including Delia) will tell you to cook the quiche at too high a temperature. I’ve said this before, but I’ll say it again – cook the quiche at around 160°C or below; you’re making a savoury custard, not an omelette!

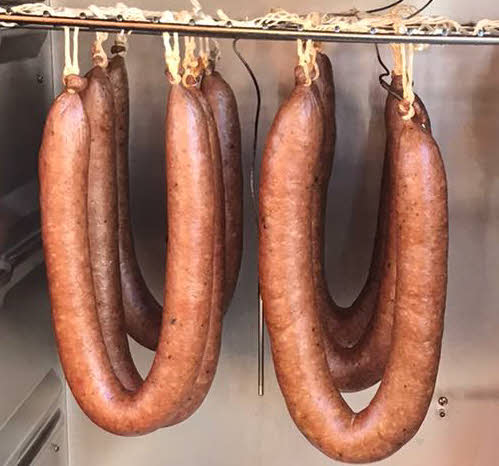
I was fortunate to receive Jane Grigson’s book “Charcuterie and French Pork Cookery”, for my birthday a week or so ago. You see, it’s not just me:

Bake in a moderate oven for about 40 minutes. Remember that a quiche is a savoury custard tart; it mustn’t cook too quickly or it will curdle.

I feel a bit of a fraud giving a recipe; it’s not rocket science, but here’s my take on it:

Pastry

6oz Plain Flour
3oz lard (or lard/butter mix)
about ¼ teasp salt
water

Rub the fat into the flour/salt until it resembles breadcrumbs, then add water a little at a time and mix until it forms a dough. In all honesty, I generally make a batch using 1lb flour, 8oz fat and 1 teaspoon of salt, in the food processor. Don’t add too much liquid or the pastry will be hard – about 1½ – 2 tablespoons (ish) should be about right for 6oz flour.

Use the pastry to line a loose-bottomed flan tin (approx. 7½ inch diameter) then prick the base with a fork, line it with parchment paper, fill with baking beans, or rice or dried beans, and bake it at 180°C for 15 minutes. Remove the beans and parchment and bake it for a further 5 minutes. Reduce the oven temperature to 160°C ready for the next stage.

Filling

6 – 8oz bacon
2 – 3oz grated cheese
¾ pint double cream
3 eggs
Salt and pepper

While the pastry is cooking, remove the rind from the bacon and discard it. Cut the bacon into small pieces and fry it, then put it on a paper towel to drain and cool. Mix the eggs and cream and season. Sprinkle the bacon over the base of the pastry followed by the cheese and then fill with the egg/cream mix. I do this while the pastry case is still on the oven shelf to avoid spillage. Bake it at 160°C for 40 minutes or so until it’s set.

It can be eaten warm but according to my wife is better eaten at room temperature the following day.

Chicken with Lemon, Basil and Garlic

I wrote this originally in 2009:

One of my old standbys –  based on a recipe from Nigel Slater’s book ‘Toast’. A book well worth buying.

The recipe is simplicity itself.

Chicken with Lemon, Basil and Garlic


Cut a chicken into 8 pieces. Put it into a roasting tin with a head of garlic (crushed up a bit) and some onion segments. Squeeze over the juice from two lemons and chuck the lemons in. Glug with olive oil and stuff in the oven at 180°C for ½ hour. Then chuck a glass of white wine in along with a handful of basil leaves. Cook for 15 minutes more and serve…

…dip ya bread in!

This is even nicer done with preserved lemons.

Pauline can’t have wine, so I used chicken stock instead. She’s going to have to go!

Butter Making

Originally posted at Christmas 2009

This time of year is great for picking up double cream that’s near its sell-by date from the Supermarket. Just after Easter or Wimbledon are also good times.

I make butter using my Kenwood mixer, you could also use an electric whisk, or even make it by hand.

I put the cream in the mixer with a pinch of salt and a small pinch of sugar for every 300ml. I’ve no idea why I use the sugar; it’s just that I saw a lady who had made the butter for Chatsworth house for about 50 years do it. Who am I to argue with her experience?

Using the K beater on the mixer, start ‘churning’ the cream

Nearly there!

If you don’t have a bowl cover use a tea towel, or when it ‘turns’ it will splatter everywhere:

Turn it off quickly when you hear the butter slopping around in the butter milk.

Now the important bit, rinse and work the butter in very cold water to get rid of as much of the milky stuff in the butter as you can, then put it onto a board and pat (beat) it – water will come out of it. I don’t have butter pats so use my hands and a rolling pin.

I flatten it, then roll it like a Swiss roll to shape it.

You can see from the photo that it needs more work to extract water – I’m going to be using it quickly so it’s not so important. This butter will freeze well, so there’s no excuse for not making plenty.

The taste reminds me of the creamy Normandy butter you get in France. It’s far better than shop-bought and for about half the price. You also get the buttermilk, which makes great scones or can be used to dip chicken into before coating in breadcrumbs or flour when making fried chicken.

Chocolate Fondant Cake

I originally posted this recipe in December 2007 but it proved so popular at a recent buffet that I make no apologies for re-posting it here.

This cake is great! It’s really easy to make and more or less foolproof. It also feeds a fair number, as it is very rich.

Ingredients

3½oz (85g) 70% chocolate (broken up)
12oz (350g) butter (in small chunks)
2oz (60g) cocoa (sieved)
3floz (90ml) boiling water (approx.)
14oz (400g) sugar
3 large eggs
7oz (200g) plain flour

Method

1. Melt butter and chocolate, in a bowl over simmering water.
2. Make a paste of the boiling water and cocoa. Remove the bowl from the water, pour the cocoa mix over the chocolate/butter and mix with an electric mixer.
3. Add the sugar, mix, and then mix in the eggs, one at a time.
4. Add the flour, mix, and then beat it on high speed for 1 minute.
5. Bake at 180C in a buttered and floured 9-inch springform tin, lined on the bottom with parchment.
6. Check after about 30–35 mins. A big crack or two will appear when it is cooked but the cake will still wobble when shaken. Depending on the oven, this may take longer.

To finish

7. Allow to cool for 20 mins – remove from springform (do not turn upside down though until cold as it may leak).
8. Leave until cold before use. The cake should ‘ooze’ chocolate when cut.

It’s seriously good

Dry Cured Corned Beef – Preparation

My good friend Paul from North Carolina revised an injection cure to use as a dry-cure for beef brisket. He cooked it to eat on St. Patrick’s day in 2020. I thought of it the other day when we were shopping at a local trade wholesaler as they had brisket on offer. It seemed an ideal time to try something like Paul made without risking expensive meat.

I decided to stick close to Paul’s recipe – I trust him in these things. However, I’ve reduced the allspice and increased the juniper to take account of our preferences.

I trimmed the meat.

Then prepared the cure.

It looks and smells good.

I put the meat into a bag for curing before I rubbed the cure onto it. It’s less messy that way.

The meat will now cure for 20 days or so in the fridge. I’ll leave it for that long because saltpetre needs time to react with bacteria in the meat to do its job.

The results and cooking instructions are in this post.

Pork Liver Pâté


In 2009, I wrote:

There are only so many faggots a man can take (I hope that no one in the US misunderstands this!). So what’s different that you can do with the masses of pork liver from your half pig? Liver Pâté is the obvious one but it’s taken me ages to find a recipe that isn’t just too… …well just too ‘livery’.

This recipe, a slight amendment of the one from ‘Charcuterie’ by Michael Ruhlman and Brian Polcyn, is the best so far. The one I formulated myself was too strong in the liver department, and bitter in taste. In my notes I wrote: “add breadcrumbs/rusk, add milk product”, that’s exactly what this recipe does. Some parts of the method are my additions.

Ingredients

1 lb/450 gms pork liver, cut into large chunks
1 lb/450 gms boneless pork shoulder, diced
1 ounce/25 gms salt
1 tsp/3 gms freshly ground black pepper
2 bay leaves
2 sprigs fresh thyme
2 tbsp/30 ml vegetable oil
¼ cup/50 gms chopped shallots
2 tbsp/30 ml brandy
2 slices white bread, crusts removed and roughly chopped
½ cup/120 ml whole milk
¼ cup/60 ml double cream.
2 large eggs
1 tbsp/6 gms chopped fresh flat-leaf parsley
¼ tsp/0.5 gm ground white pepper
½ tsp/1 gm freshly grated nutmeg

Method

1. Put the meats in separate bowls with half the salt, pepper, thyme and bay in each, mix and marinate separately for 8 hours or overnight.
2. In a frying pan, sear the liver in the oil until brown, add the shallots and cook until translucent, add the brandy, cook off the alcohol, scrape all the bits off the bottom of the pan and put in a bowl to cool in the fridge.
3. Mix the bread, milk, cream and eggs well and set aside.
4. Keeping everything very cold, mince everything except the bay and thyme (which can be thrown away) through the fine plate of your mincer. (watch out as the liver has a tendency to squirt through the mixer plate!).
4. If you want an even finer pâté put the lot in the freezer with your food processor bowl for 20 minutes or so. Then process until very fine. Check the temperature with a thermometer regularly – don’t let it exceed 15°C. (Food processors heat food very quickly so watch out – or omit this step).
5. Line a mould with cling film, greaseproof paper, or baking parchment and fill it pushing the mix into the corners. Cover the pâté with the chosen lining and then with foil.
6. Put in a bain-marie (roasting tin of hot water) in the oven at 150°C, test with a thermometer after about 1-1½ hours – remove when it’s been above 65°C for 10 minutes if using pork (or when it reaches 72°C for chicken liver).
7. Put weights on top of the pâté and cool.

Salt (Corned) Beef

In 2008, I wrote:

In this country, we are used to corned beef out of a tin. The corned beef I am making is more like an unsmoked version of Pastrami. It gets its name from the ‘corn’, grains of coarse salts that are used to cure it. Traditionally made with brisket it can also be made with other cuts – in this case, a piece of topside weighing about 3lb.

The cure used is:

Ingredients
Water 1500gm
Salt 180gm
Light Brown or Demerara Sugar 180gm
Cure 1 (Prague Powder 1) 48gm
Juniper Berries 10
Cloves 2
Black Peppercorns 6
Parsley Stalks 2
Thyme Sprigs 2
Bay Leaves 1
Coriander Seeds 6

Method
Crush spices roughly and boil in water with sugar and salt. Cool and add cure. Pump with 10% of the meat’s weight of cure and immerse in the remaining cure for 5-6 days.

I put this in to cure on New Year’s Day. The meat weighed 1480gm, so was injected with 148gm of cure. Today, I have washed the meat in cold water and put it in a casserole with a chopped onion, carrot and a celery stick, along with about ½ pint of boiling water. I cooked it in the oven for 2½ hours at 160°C.

Added 2021: This recipe produces a very mildly spiced corned beef which I like for sandwiches. I like to slice it thinly and use 4 or 5 slices rather than one thick slice. It makes a nice, if somewhat untraditional, Reuben sandwich. I’ve recently posted a recipe for a dry-cured salt beef that has more spice and should be better for eating as a hot meal.

North Staffordshire or Derbyshire Oatcakes

In 2013, I wrote:

It’s quite amazing how certain foods are so local that even though you live in the County bordering those where they’re made you’ve managed to get to 56 years old without ever having them.

The Derbyshire or North Staffordshire oatcake is such a one; it wasn’t until about 6 weeks ago, on a visit to Hartington, that I had tasted my first oatcake. I’ve hardly stopped eating them ever since!

Unlike the biscuit that shares its name, the oatcake is soft. I’ll leave the debate as to whether they’re originally a Staffordshire or Derbyshire specialty to others, but certainly, Stoke on Trent is now its spiritual home. ‘National Oatcake Day’ is celebrated in the area on 8th August, and the local football club’s fanzine is even named after them.

So, what is it? Well, it’s a sort of egg-less oat pancake made with a yeasted batter: a ‘Tunstall’ tortilla’ or ‘Potteries paratha’! The traditional way of eating them is hot, folded over various fillings. The local potteries newspaper, The Sentinel, lists cheese and bacon as the favourite; bacon, cheese and tomato second, and plain cheese, followed by cheese and mushroom, third and fourth. Sausage in various combinations is also popular. The possibilities are endless and include sweet fillings such a vanilla custard and jam.

When I said I’d never tried one, I’d not only never tried them, I’d never even heard of them. It was only the threatened closure of the last oatcake shop selling ‘through the window’ that brought it to my attention. Regrettably, that battle appears to have been lost: Google street map shows the shop derelict and boarded up.

At the time, I thought that I’d get a recipe and make some but with no benchmark to judge by, I wouldn’t have known whether they were anything like authentic. Having now tried them, I’m in a better position to judge; albeit they were the Derbyshire variety: Hartington is at least a mile into Derbyshire from the Staffordshire border! I joke. The ones I tried were definitely the Derbyshire variety, I was near the border in Hartington, but they were from a bakery in Chesterfield.

A quick look on the web and in my cookery books has produced a number of very similar recipes, often with the same recipes being quoted for both the Derbyshire and North Staffordshire varieties; it is, however, generally accepted that the North Staffordshire variety has a higher ratio of liquid to dry ingredients than those from Derbyshire.

The main ingredients are fine oatmeal, flour, yeast, water, milk, salt and sugar. However, within those the there are many variations: different types of flour, using all water, or a mixture of milk and water, the ratio of liquid to dry ingredients, and many more.

Fine oatmeal is not easily obtained, so I used standard porridge oats from the supermarket and ground it in a coffee grinder. I have some medium oatmeal that I’ll grind the same way; it’ll be interesting to see if there’s any difference between the oatcakes.

Here’s the recipe that I used. The ratio of basic ingredients is very similar to both the online and printed recipes that I’ve seen. I settled for a liquid level halfway between the amounts most commonly quoted for Derbyshire and Staffordshire varieties; this gives a medium thickness of oatcake. For thicker ‘Derbyshire’ ones, reduce the liquid to around 700ml, for thinner ‘North Staffordshire’ ones, increase it to around 850 – 900ml.

North Staffordshire or Derbyshire Oatcakes

225gm oatmeal
125gm Plain flour
100gm Wholemeal flour
7gm ‘Instant’ or ‘Easy Blend’ yeast (1 packet)
1 level teaspoon salt
350ml Water (around 37°C) – you may want to add slightly more if you like a thinner pancake.
450ml Semi-skimmed milk (around 37°C)

The recipe is easily adapted for vegans – just replace the milk with more water.

Mix all the dry ingredients together and gradually add the liquids, whisking to form a smooth batter. Leave it for an hour or so in a warm place ’till it there are lots of bubbles on top of it, a warm kitchen’s fine.

Heat a pancake pan, or frying pan, over medium heat until hot. Grease it lightly with oil; I used a non-stick 24cm pancake pan and used an oil spray like this one to give a very fine coating of oil:

Pour, or ladle, approximately 75-100ml of the batter into the pan tipping the pan to spread it all over. Cook until the top looks dry and it’s golden underneath. Turn it over and cook the other side. Repeat with the rest of the batter; it should make 12-15 oat pancakes.

A word about turning the oatcakes over. I find that by far the easiest way is to toss them. Trying to use a palette knife just results in a batter-wrapped palette knife! If an oatcake lands off-centre, I leave it for about 20-30 seconds before shaking the pan to centre it. This allows the oatcake surface to seal before trying to move it.

Whilst bacon and cheese is my favourite topping, I really enjoyed a cheese and black pudding one this morning:

It may only have been rat-trap Red Leicester and a mass-market black pudding, but it tasted mighty good!

Queso blanco, or Paneer (Panir)

In 2012, I wrote:

Here’s a great cheese-related activity to do with a group of school kids that won’t break the bank. Paneer, an Indian vegetarian cheese – or the cheese your granny made out of sour milk!

That said, I’ve only ever made it from non-homogenised milk, which works out a tad expensive ‘cos those large cheap plastic containers of milk in the supermarkets are invariably homogenised.

Ah well, nothing ventured, nothing gained: the investment of a whole £1 coin got me 2 litres of ALDI’s best full-fat milk.

To make the cheese is simplicity itself: put the milk into a pan and bring it to the boil stirring regularly so that the milk doesn’t stick to the bottom of the pan. Just before it boils (or at least when it’s over 80°C) add a couple of lemons worth of lemon juice or about the same amount of white vinegar. Give it a quick stir then leave it for a couple of minutes or so. The milk should split into white curds and a watery light-green/yellow/clear whey. If it hasn’t, boil it back up and add some more lemon or vinegar. Pour the whole lot into a cloth-lined colander and run it under cold water to cool it, then leave it to drain:

…you can save the whey to use in scones or soda bread if you want.

That’s basically it – you can go on to wrap the cheese up and press it (I did, under a stone mortar). You can add salt, herbs, spices etc to it or you can even use it for sweet puddings or have it dribbled with honey. If you press it for a couple or three hours, you can cube it or mould it into balls. Then, unlike virtually all other cheeses, it will fry without melting; it’s great in the Indian dish of peas and cheese – Mattar Paneer (Panir).