Forgive the long title; I was going to title this ‘Fennel Lonzino’ and had actually typed that when I thought that it’s a bit of a liberty to do so when I’ve not got a clue as to whether the Italians use fennel in their lonzino.
I’d got in mind to make a more classic product with the simple flavours of pepper and garlic, which I understand to be a traditional lonzino. However, given that this is a piece of industrially produced meat and is likely to have less flavour than the meat I would usually use, I decided to go with the stronger flavour of fennel.
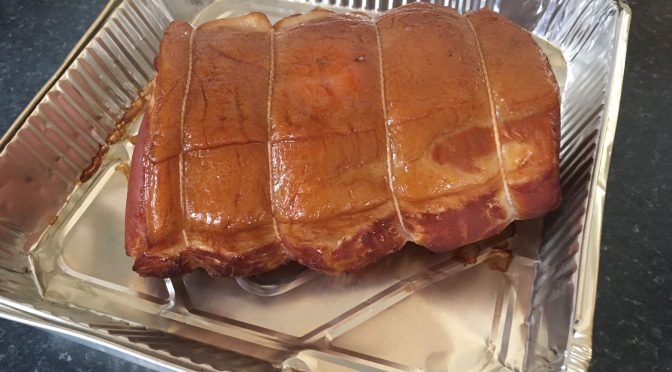
When I wrote about the Kasseler style smoked loin, I said that I’d make some more but use a dry cure rather than a brine.
I started two last month; I’ll smoke one and leave one unsmoked as my wife, Pauline, is not too keen on smoked food.
We’ll use it sliced in place of ham and it may even find its way into the odd bacon butty as it’s a loin version of US bacon! I’ll not be stopping making real British bacon any time soon though – have no fears about that!
On my old blog, I had a tutorial about converting a fridge into an air-drying chamber. There were pages on temperature control and humidity and a whole lot about wiring the different controllers.
Fortunately, time moves on and bespoke controllers are now available and are relatively cheap. No more sourcing relays, making control boxes and wiring it all up.
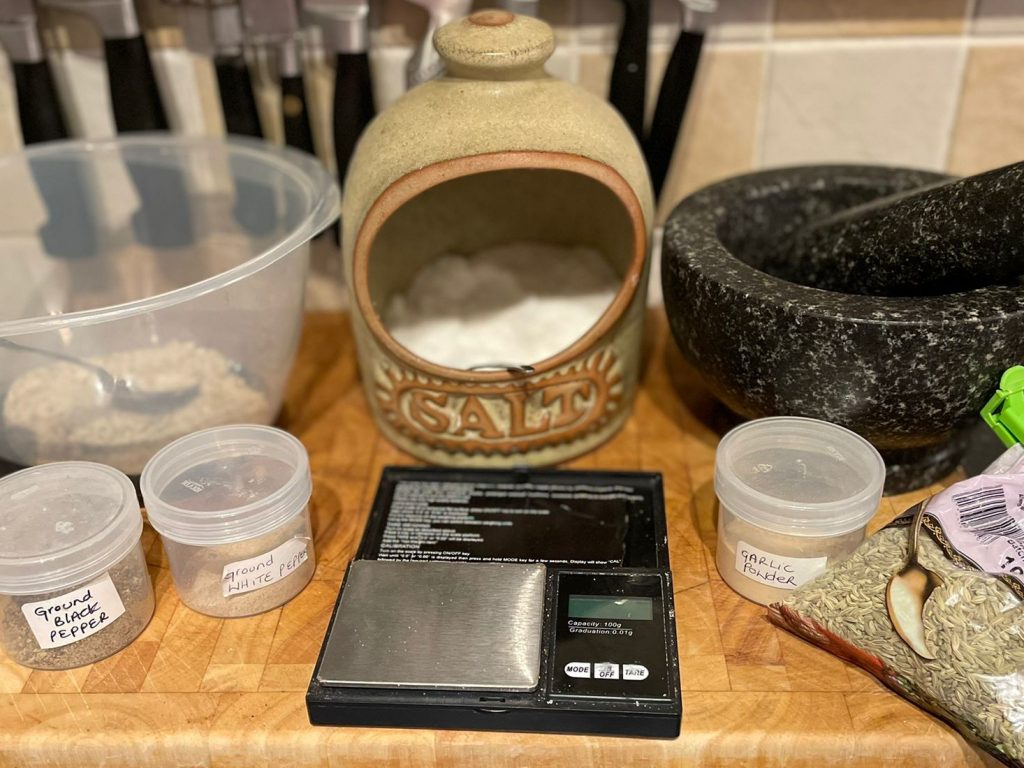
This cure calculator can be used for measured dry cures or equilibrium brine (wet) cures. Measured dry cures are also sometimes referred to as EQ Cures.
It is designed for the experienced curer – those who will know to adjust the meat weight for any bone. Those who realise that meat takes a very long time to reach equilibrium in an eq brine.
They will also be aware of curing safely and using a sufficiently strong brine to protect the meat whilst it is curing when using a brine cure.
The input to the form is in grams rather than lb and oz. This is for purely practical purposes; for example, 2.5% of 1000gm is far easier to calculate than 2.5% of 2lbs2oz. It also uses weight for all measurements; this is because the volumes of solids are variable.
As many people cure using a brine weight that’s half the weight of the meat, the calculator asks the total brine weight that you require and then calculates the ingredients for that amount of brine.
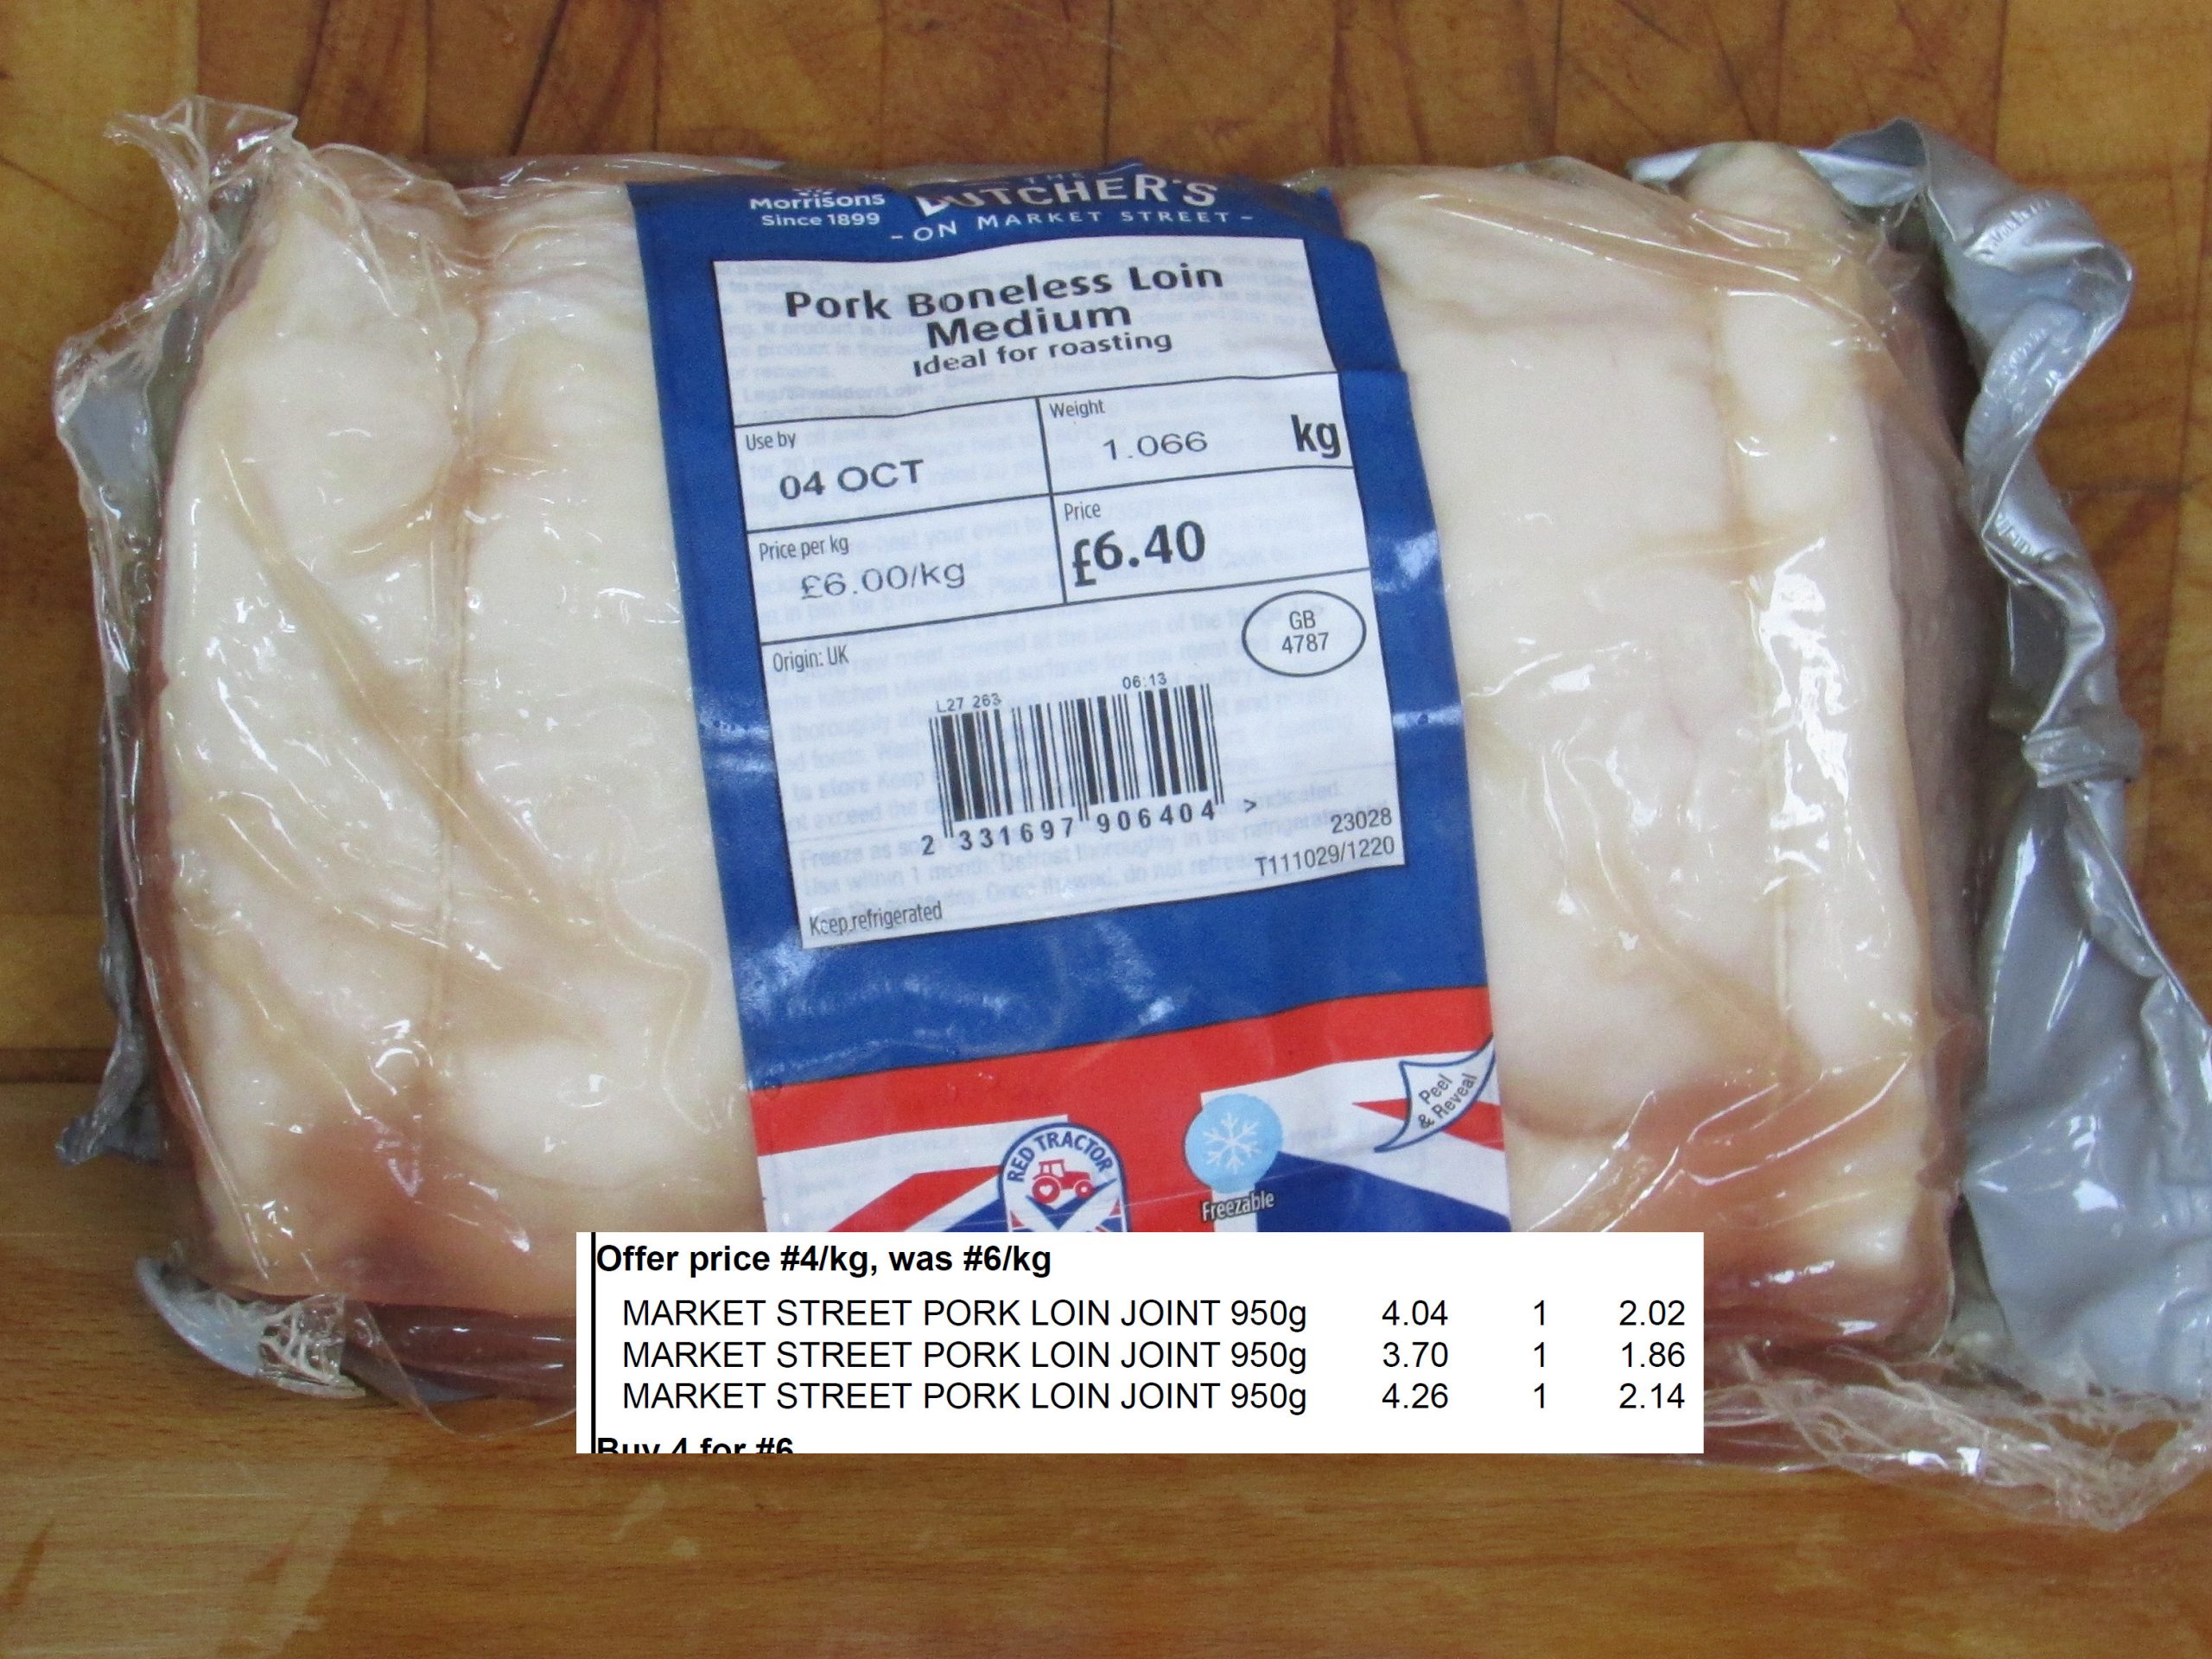
Whilst I am a great believer in using locally produced meat from independent suppliers I’m also aware that many people don’t have the income to do this.
I hope to show with this project that you can still make some great products despite this. Many are cheaper than buying them from the supermarket. Yes, the quality may be better with meat produced to higher standards but good products can be made using meat produced on an industrial scale.
This is the piece of meat I bought from a local supermarket that sells pork produced in Britain. It’s around a kilogram of pork loin and cost £4.26 as it was discounted to £4 per kg.
That still may seem like a lot of money to some but the meat it makes can be used instead of cured ham, fried as bacon or be cut into thick slices to use as pork steaks/bacon chops – all of which would be more expensive to buy.
In Germany, it’s called Kasseler and is usually cured with the bones still in; it’s served as bacon chops. Some online references talk of it being smoked, cooked and then stored in brine which seems an odd way of going about things! However the few recipes I can find all make it in the normal way.
I decided to follow my friend Paul’s instructions for cooking the corned beef. He said to braise it slowly in chicken stock; I hadn’t any defrosted and so used water with the meat sat on a sliced onion.
The dry-cured beef that was put to cure on 29th August has now been curing for 20 days. How did I calculate the cure time? Well, it depends somewhat on the type of cure. Older cures tended to use lots of salt and then cure for a number of days per inch of meat. You still see people advising this online. However, that doesn’t apply in this case as the cure was formulated so that however long it’s left there can only be 2.5% salt in the meat. That’s about the same level as in mild bacon. I’ll braise the meat in liquid which will reduce this level further.
More important is that I chose to cure it for 20 days to give plenty of time for the saltpetre to work. Unlike the sodium nitrite in Cure #1, saltpetre (potassium nitrate) has to react with bacteria in the meat to lose an oxygen molecule and become potassium nitrite. It’s that nitrite that gives the meat protection and its colour.
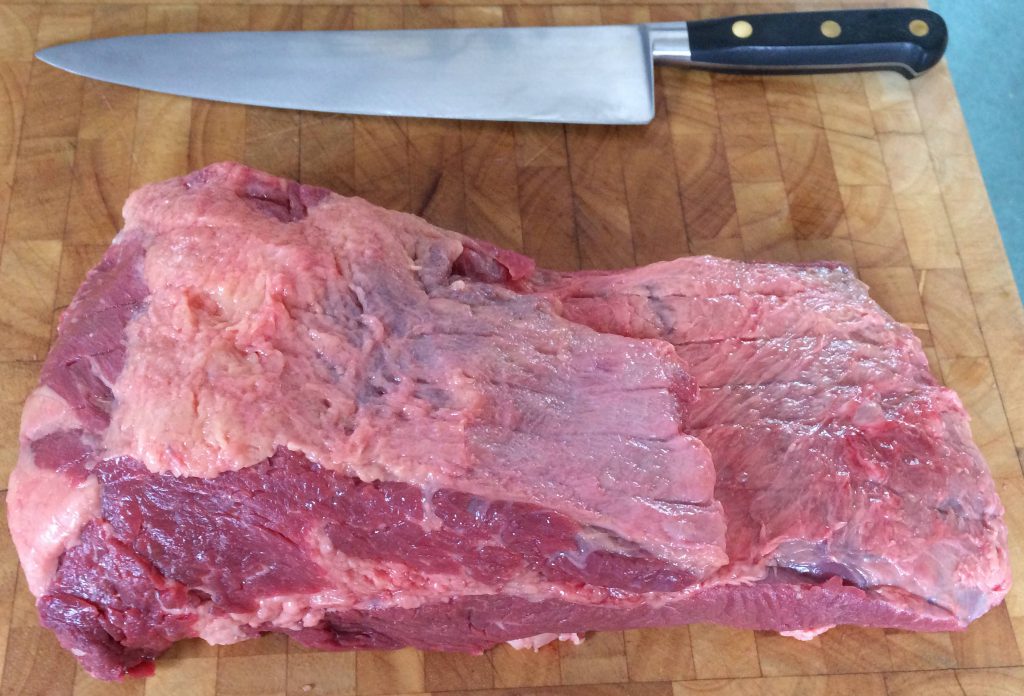
My good friend Paul from North Carolina revised an injection cure to use as a dry-cure for beef brisket. He cooked it to eat on St. Patrick’s day in 2020. I thought of it the other day when we were shopping at a local trade wholesaler as they had brisket on offer. It seemed an ideal time to try something like Paul made without risking expensive meat.
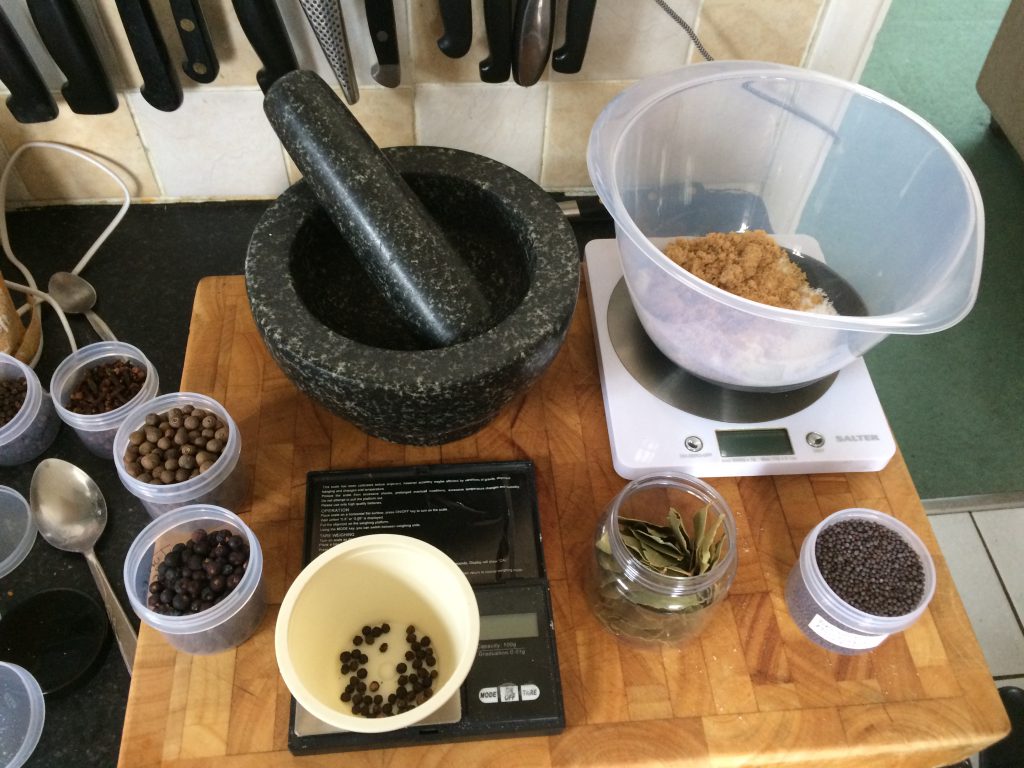
I decided to stick close to Paul’s recipe – I trust him in these things. However, I’ve reduced the allspice and increased the juniper to take account of our preferences.
I trimmed the meat.
Then prepared the cure.
It looks and smells good.
I put the meat into a bag for curing before I rubbed the cure onto it. It’s less messy that way.
The meat will now cure for 20 days or so in the fridge. I’ll leave it for that long because saltpetre needs time to react with bacteria in the meat to do its job.
The results and cooking instructions are in this post.
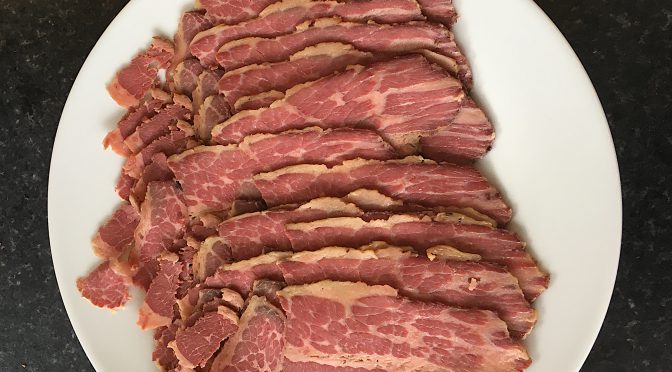
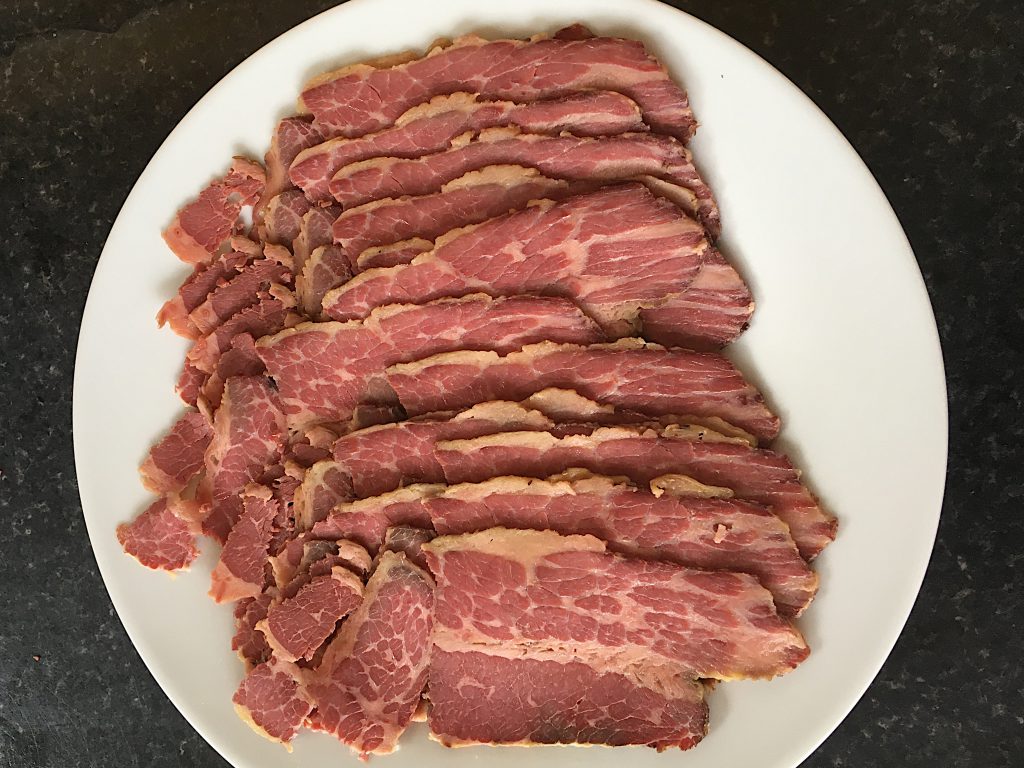
In this country, we are used to corned beef out of a tin. The corned beef I am making is more like an unsmoked version of Pastrami. It gets its name from the ‘corn’, grains of coarse salts that are used to cure it. Traditionally made with brisket it can also be made with other cuts – in this case, a piece of topside weighing about 3lb.
The cure used is:
Ingredients Water 1500gm Salt 180gm Light Brown or Demerara Sugar 180gm Cure 1 (Prague Powder 1) 48gm Juniper Berries 10 Cloves 2 Black Peppercorns 6 Parsley Stalks 2 Thyme Sprigs 2 Bay Leaves 1 Coriander Seeds 6
Method Crush spices roughly and boil in water with sugar and salt. Cool and add cure. Pump with 10% of the meat’s weight of cure and immerse in the remaining cure for 5-6 days.
I put this in to cure on New Year’s Day. The meat weighed 1480gm, so was injected with 148gm of cure. Today, I have washed the meat in cold water and put it in a casserole with a chopped onion, carrot and a celery stick, along with about ½ pint of boiling water. I cooked it in the oven for 2½ hours at 160°C.
Added 2021: This recipe produces a very mildly spiced corned beef which I like for sandwiches. I like to slice it thinly and use 4 or 5 slices rather than one thick slice. It makes a nice, if somewhat untraditional, Reuben sandwich. I’ve recently posted a recipe for a dry-cured salt beef that has more spice and should be better for eating as a hot meal.
It’s not been a very productive week, however, I managed to start off a Lonzino Stagionata. I think this is the correct term for what is a cured air-dried loin of pork, Italian style.
It’s basically like a parma ham but from the eye of the loin. Expensive, but superb.
I started off with 4½ kg of pork loin from Joseph Morris’s. It was boned and the eye of the loin removed yielding 1½ kg of meat for the Lonzino and a further 2¼ kg of meat/fat that will be used in chorizo.
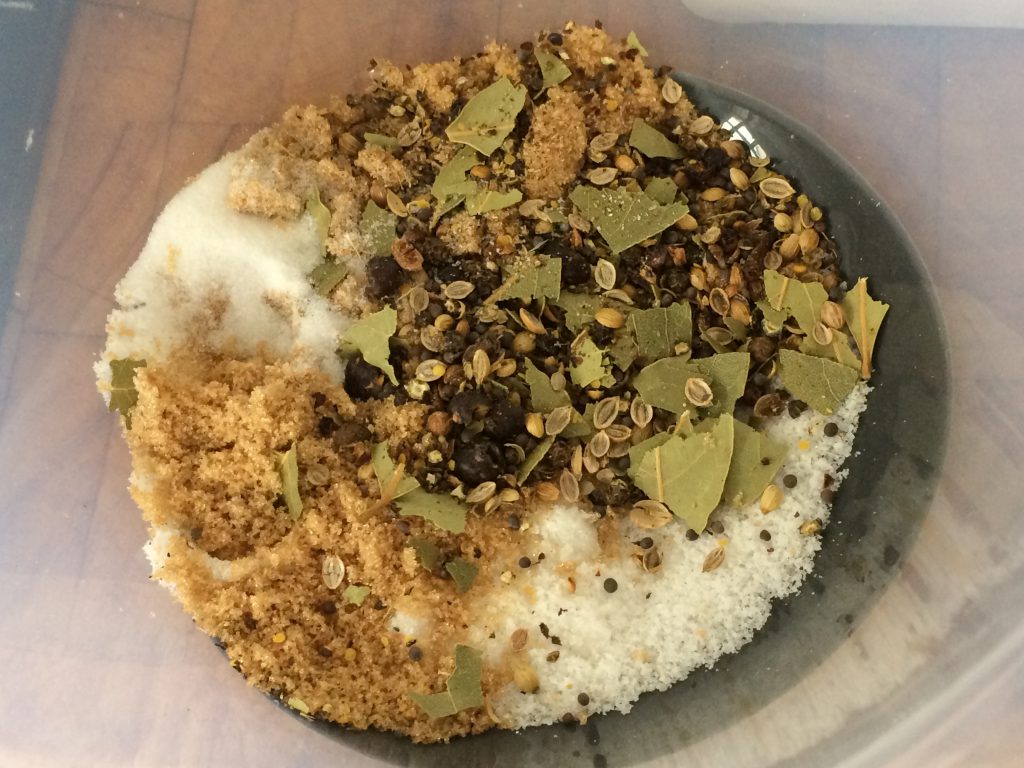
Now for the cure, what should I use? I am at something of a disadvantage here as I’ve never tasted Lonzino. Online recipes, of which I found only two from trusted sources, varied considerably in the spices used so I was left with making up my own interpretation from the (little) information available – it’s turned out as a sort of combination of the two online recipes. Whether it will be anything like the original is anyone’s guess! Anyway, here it is:
For 1 kg meat I used:
Salt 34gm Sugar 10gm Cure #2 – 2.4gm Black Pepper 5gm Fennel Seeds 4gm White Pepper 3gm Garlic Powder 2.5gm Cinnamon 1gm Mace 1gm 1 Clove
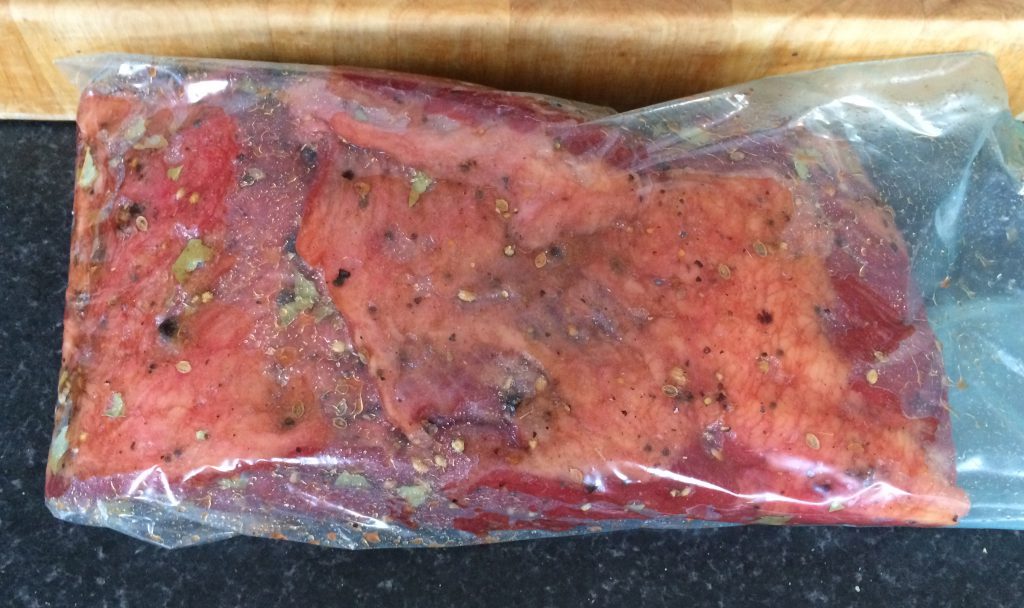
Grind the spices and mix with the other ingredients. Rub cure into the loin then put it into a food grade bag or vacuum pack it.
It will cure for 10 days or so.
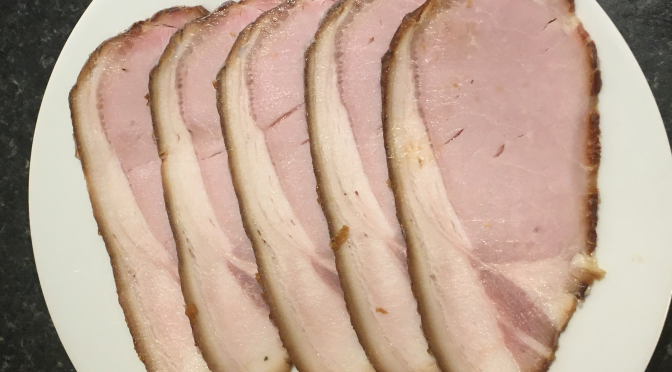
The Lonzino was cured for 12 days. I washed and dried it and put it into a 90mm collagen casing. The casing was tied (badly!) and pricked to aid drying.
I left it drying at 10 – 15°C in a humidity of 60 – 70% (ish) until it lost about 40% of its weight.
The black wires in front of the Lonzino are from the humidity and temperature sensors in the fridge.
In late August I sliced some of it Getting to that stage was not been without its problems what with a new fridge set up for the drying it’s been a case of juggling things about to get the humidity at the correct levels – not helped by the weather we had at the time.
It’s a little dry around the edges, surprising as if anything the humidity was a little high in the early stages of drying. I dried it to a 36% weight loss. Next time I’ll dry it less and test for water activity to make sure it’s safe. I don’t think the drying was helped by the small size of the loin or the fact that I de-cased it after about 20 days as some undesirable moulds were starting to form under the casing – I obviously hadn’t got it tight enough around the meat. The mould? I brushed that off, rubbed the area with wine vinegar to kill any remaining nasties, and sprayed the meat with Penicillium Candidium – the white mould that is seen on Brie and Camembert cheeses. Within a few days a nice coating of white had appeared:
Pauline really likes its fennel overtones; I’m not as keen. Yes I like it, but think I will do a Lomo next time – basically, Lomo’s the same thing but with paprika flavours – Spanish as against Italian. That said it’ll make a nice addition to the growing charcuterie store.