An attempt to demystify the salami making process.
To overseas readers, I apologise that the links to suppliers are all UK based, however, the information is relevant regardless of that.
The basic process
Making the sausagemeat
Adding a salami culture
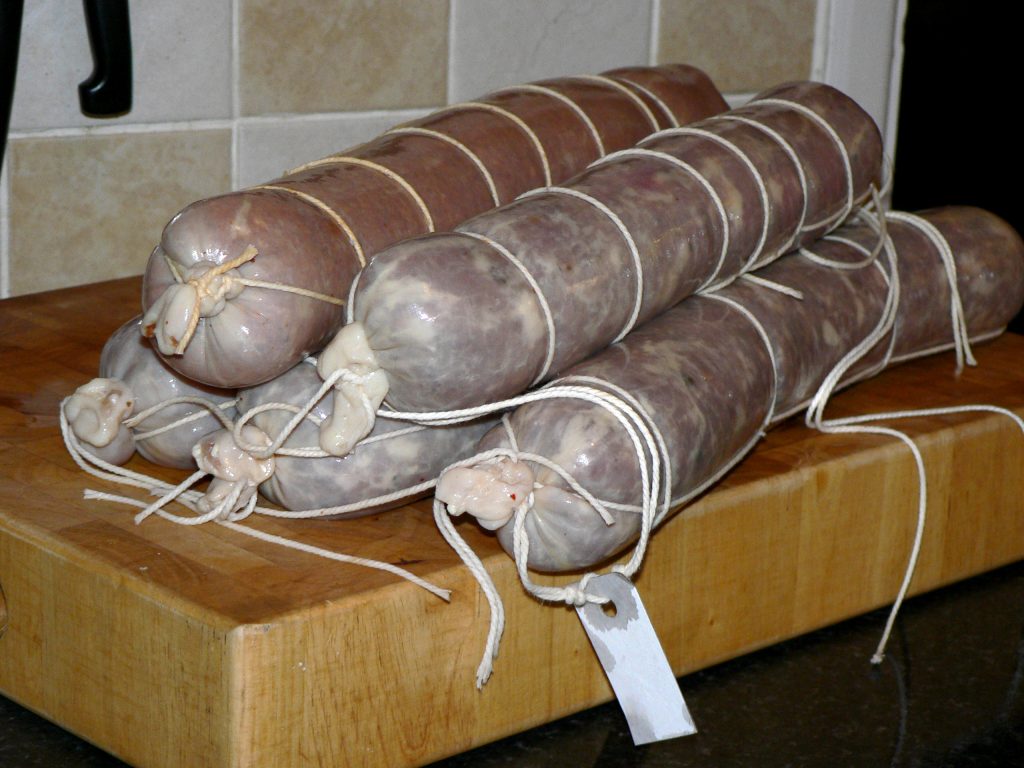
Stuffing the sausagemeat into casings
Fermenting them in a warm environment for a controlled time period
Hanging them at a controlled temperature and relative humidity to dry
The rules
Many governments have rules about the production of commercial salami products even if it’s only the level of curing salts that are allowed in them. The USA and Canadian authorities also have rules governing the time drying and time allowed for fermentation – it’s to those rules I’ve looked for good practice in those areas. It makes sense for home producers to follow those rules or at least make informed decisions about choosing not to.
It was only 8 years ago that I wrote a post forecasting that barbecue would be the next big food craze to hit the UK. Amazingly, not only was I correct but the craze seems to have now filtered down resulting in a massive interest in all things barbeque on social media. TV chefs feature US-style barbecue in their programmes and pulled pork and brisket feature on both pub and home BBQers menus. Back then, I wrote:
Wasn’t it George Bernard Shaw that said: “England and America are two countries divided by a common language”? Barbecue, abbreviated to BBQ, really goes to prove this.
What we know as Barbecue or bbq is generally referred to as grill or grillin’ in the US. Their BBQ is a method of cooking meats for a long time at low temperatures. It often includes smoking the meat for part of the cooking time. Times of 10 or 20 hours are not unusual in this type of cooking.
BBQ guys take their hobby seriously and hold competitions where the prize-money can be 1000’s of dollars. Although on the face of it the same as hot smoking, the temperatures are usually higher.
I can see this type of cooking being ‘the next big thing’ in the UK. We’ve already seen slow-cooked meats increasing in popularity with slow-cooked pork belly featuring on virtually every menu you see nowadays! Pulled pork, a classic BBQ standard, is featuring more and more in blogs and among the celebrity chef circuit. We’ve also seen a move towards better quality in burger joints and vans and an increase in general in the quality of street-food. This, accompanied by a number of TV programmes featuring US BBQ joints, such as Diners, Drive-Ins, and Dives, makes me think that this’ll be the next culinary craze… …Oh, and also look out for the currently trendy use of brioche buns to be upstaged by buns cooked like pretzels.
I’m sure that this will also feed through to the home market – old and new suppliers will hurry to jump on the BBQ bandwagon. There’ll be terms and equipment that we’re not (yet) used to in the UK: Offset Smokers, Water Smokers, Oven (or box) Smokersand even Ugly Drum Smokers.
I’ll write further about the options currently available in UK for both smoking, grilling and BBQ shortly.
I did write another post that explained the differences between the types of smoking and barbecue and the available equipment at that time. The post has been reposted here.
Wow, how things have moved on. There’s equipment available now that we could only dream of then – unless you could make it yourself or had very deep pockets that is.
It can still be an expensive game but it doesn’t have to be. There’s far more equipment available across a range of prices and also more advice and support is available for people building their own equipment – not least because of social media groups on Facebook and the like.
It’s great that so many more people are now cooking quality meals using barbecues. Yes, there are many who have just replaced a plate full of cheap meat products with a plate full of expensive meat products and yes, there’s still an element of the UK equivalent of ‘redneck’ in attitudes to non-meat-eaters on some online groups. But, there are also more and more people using barbecues, in whatever form, to cook balanced meals whether meat or vegetable-based.
I have to say that although I’ve had a smoker that could produce barbecued food for years, it’s only in the past couple or three years that I’ve cooked more barbeque and grilled food – since I bought a covered BBQ grill (Weber) and my nephew built me an Ugly Drum Smoker. I hope to write more of these in future posts. I’m by no means an expert but hopefully have a head start as I know a good number of people who are, including a very good friend from North Carolina who is my go-to for advice on traditional US-style barbecue.
I hope to post some traditional recipes, along with some alternative ideas over the next few months.
In 2012, when I wrote this, people were only just starting to realise that smoking meat didn’t need to be the preserve of the expert and that there was an alternative to barbecues that consisted of burnt sausages and dried up burgers.
This post is completely out of date. I leave it here for the sake of posterity:
In a previous post, I said I’d give further details of the options for smoking, grilling and barbecuing food. My health and other factors have delayed this, but here goes…
…Let’s start cold and get hotter!
Cold Smoking
So to cold smoking. What’s that? It’s a method of smoking food at temperatures below 30°C/86°F (approx) so that it is still uncooked. It’s the method that produces smoked salmon that when thinly sliced and nicely presented sells for silly money. The cold process also allows items that would otherwise melt, such as cheese and butter, to be smoked. Surely, I can’t do that? Well here’s news for you: you can. In fact, it’s easy; all you need is one of these cold smoke generators. With this, you can smoke fish, meat, cheese, eggs, even salt, the list’s as big as your imagination. Just find a suitable container: a cardboard box, old fridge, barrel, large bucket etc and you’re away. You can even buy a ready-made cardboard smoker – it may seem expensive and hardly durable but the one I road-tested in 2010 is still being used regularly by a friend of mine.
There are many other methods of cold smoking; I’ve tried many of them. None are as cheap, easy, and produce smoke for as long without intervention as this.
As to the cold smoking process, this normally involves brining, dry salting or curing the meat/fish and then smoking it for anything from 12 hours up to 7 – 10 days for large hams. With items such as fish that are salted rather than cured, it is necessary to achieve a certain weight loss to make the product safer. Further details of the smoking process (for salmon) can be found in my A Tale of Cold Smoked Salmon post or in this advice from the Torry Research Station
(Note: The Cold smoke generator and accessories may be cheaper from a ProQ stockist rather than direct.)
Hot Smoking
There are three main types of hot smoking and with all of them you end up with a fully cooked, ready-to-eat, product. They differ only in the temperature and the length of time for which the food is smoked.
Traditional Hot Smoking
To call it hot smoking is really a bit of a red-herring, it’s not exactly hot. It works at temperatures in a band between 41°C/105°F and 80°C/176°F (although smoke will usually be applied only up to about 60°C/140°F). That’s right at the bottom end of domestic oven temperatures. The reason for using such low temperatures is to allow items such as sausage and luncheon meats to be smoked without the fat in them melting. Think fat around the meat in a tin of corned beef and you’ll see why we want to avoid this.
Cabinet smokers using gas or electricity as a heat source are the easiest to control at these temperatures over the comparatively long time that hot smoking takes.
Regrettably, the UK is way behind the USA in manufacturing smokers specifically for this purpose. The main one seen regularly is the Bradley Smoker, a great machine if you don’t mind the cost of the special wood pellets that it uses. Cabinet smokers are also available from The Garden Gift Shop. I have not seen or used either of these, so you purchase at your own risk. Periodically, this type of smoker appears on eBay, usually from the US or Germany. The postage for US ones is often more than the cost of the smoker!
Many people will choose to make their own hot smoker. Mine is effectively a metal box sat above a gas ring. I made it this way to avoid having the gas supply inside the box with the inherent dangers involved if the flame goes out. If you choose to use gas, please take advice from a qualified gas engineer before doing anything. Electricity appears to be the safest method to use, subject to wiring by a qualified electrician but gas does give a moister atmosphere which is desirable. Either heat source will require a box to contain the food, usually a metal one although quite a number of the US members at the sausagemaking.org forum have made them successfully in wood. If possible, it’s good for the smoke chamber to be insulated to save on energy.
This is my hot smoker/bbq, note that the gas burner is segregated from the smoker by a steel plate and that, apart from supports for the burner, the base of the box has been removed. The smoker is effectively just a big metal box sitting on a burner!
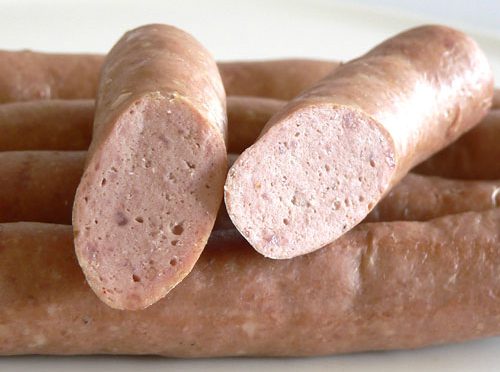
When making sausage or luncheon meat using this type of smoking it is advisable to use curing salts to protect the meat during the long period that it is in the temperature danger zone. A typical smoked sausage would be placed in the smoker at 50°C/122°F for about an hour without smoke until the casings are dry. Smoke is then applied as the temperature is raised to 75°C/167°F over a period of 3 – 4 hours. The product is then cooked at 75°C – 80°C/167°F – 180°F (Temperatures as high as 90°C/194°F are acceptable, but only for a short period of time). It’s cooked until it reaches an internal temperature of 67°C/153°F and then held at this temperature for 10 minutes. Alternatively, it can be cooked to an alternative safe temperature. The sausage is then cooled as quickly as possible using a water spray/bath and subsequently refrigerated.
Barbecue (BBQ)
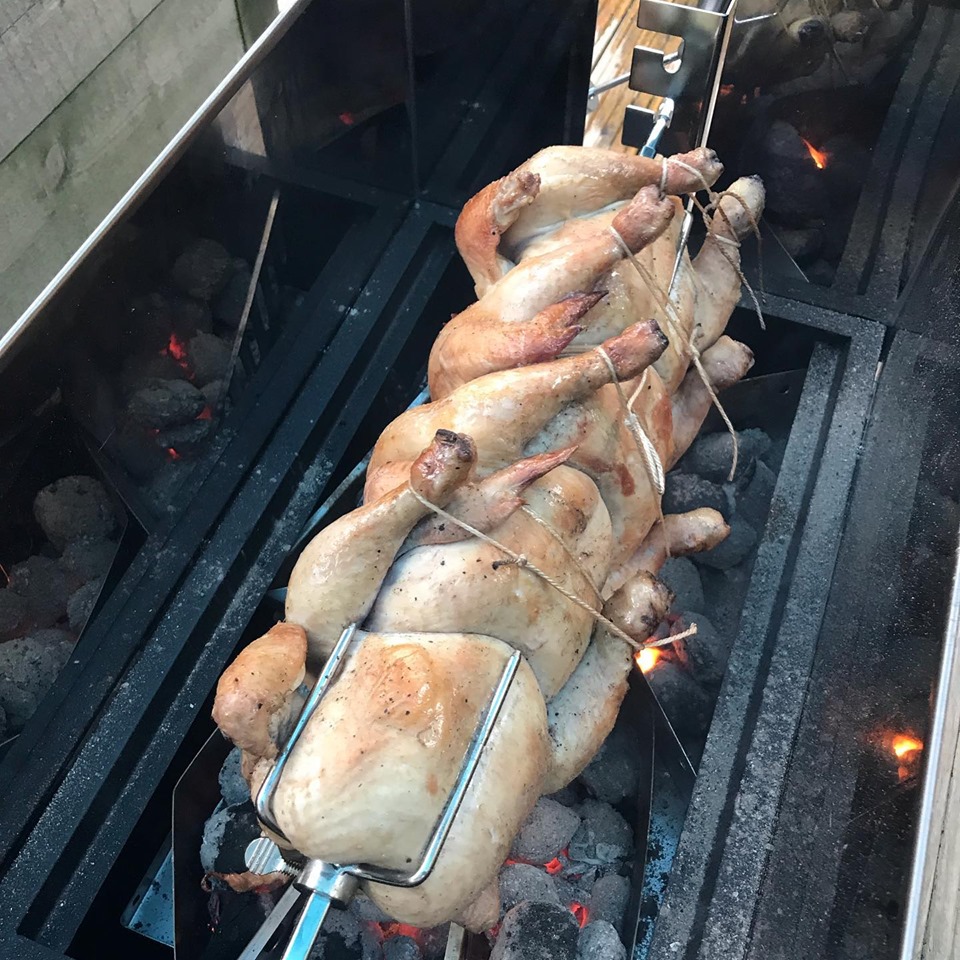
In my previous post I explained that there is a difference between what we know as BBQ and what the Americans know as BBQ. In this section, when I talk of BBQ I’m referring to US style BBQ – long and slow cooking with smoke for some of the time. For this we need a covered BBQ that is capable of holding quite a low temperature for a long period of time – may be up to 20 hours – even a chicken will take 4 – 6 hours to cook. Here we’re looking at temperatures higher than hot smoking, but still right at the lower end of those in a domestic oven. Between 90°C/194°F and 150°C/300°F, with most of the cooking taking place between 105°C/221°F and 125°C/257°F. We’ve already looked at cabinet smokers, these are fine at holding these temperatures but many BBQers frown on the use of anything other than wood and charcoal. A number of companies make BBQ’s that maintain these low temperatures over long periods of time. Needless to say, they are far more readily available in the US where hobbyists will spend $1000’s on their ‘BBQ pit’. Have a look here and you’ll see what I mean.
There are two main types available, bullet and offset – you can see both types here. In the UK you’ll find products (In rough order of lowest cost) from Brinkman, Pro Q, Weber, and a number of others.
An option is to make your own. The cheapest and easiest to make is called a UDS (Upright or Ugly Drum Smoker – depending on your point of view!). There are details of how to build one on The Smoke Ring forum.
In this style of BBQ the meat is sometimes brined usually a dry rub is applied and then it is cooked very slowly, with or without, smoke. It produces succulent meat and is usually served with a bbq sauce – whole shoulder joints of pork, whole chicken, briskets, all those cheaper cuts that would be like leather cooked at high temperature are fantastic cooked like this. Side dishes such as bbq beans will be cooked at the same time.
I’m a novice in this type of cooking so for further information please see the fantastic US website amazingribs.com where every aspect is covered.
Tabletop/Biscuit tin Smokers
Now anyone can do this! Imagine the scenario, you’ve been given a trout by a local fisherman who has kindly filleted it for you (Yeah, I bet!). You’d like it smoked but don’t have any fancy equipment, but you have got some BBQ wood dust/chips. Easy, just line your wok with a double layer of ‘tinfoil’ put some wood chips on it, create a stand for the fish to sit on – a round cake rack or a couple of chop-sticks with a plate balanced on them – put the fish on it, stuff the lid on and put it on the heat. Open every door and window and try and get rid of the smell for a week ‘cos a little bit of smoke goes a long way! It’s OK for TV chefs to do; they don’t have to live with the smell and the mess afterwards!
So what are the options?
There are any number of commercially available stovetop smokers, probably the best known and most widely available is from Camerons; there are many others of a similar design. Some include a spirit burner, others don’t. To be honest, it’s so simple to make your own with a biscuit or sweet tin or even a couple of roasting tins that spending £50 on one seems wasteful. You could, of course, use the wok method described earlier – but maybe it’s best done outside! It’s cheap and simple and produces great food. Go on, what’s stopping you?
Typically, fish is the chosen food for these types of smokers, but that’s not to say that other things can’t be used. A quick brine/salt certainly helps and then it’s smoked with a handful of wood dust/chips. About 20 – 30 minutes is usually enough to cook thin fillets.
Grilling (UK – Barbecue)
Basically, cooking food on a (usually) uncovered barbecue. At its best superb: at its worst, you get someone who cooks once a year trying to prove that food is carbon-based by turning it into charcoal! If you’re in the former category, invite me around. Joking aside, you don’t need me to tell you what’s available out there to cook on – there’s equipment to suit every price range.
Resources and Reference
Torry Research Institute Publications: Hot Smoking of Fish Kippers Smoked Trout Smoked Mussels and Whelks Smoked White Fish Smoked cod roes Smoked saithe/coley Botulism and Fishery Products
With more and more people air-drying meat having seen programmes like those made by Hugh Fernley Whittingstall (HFW) there seems to be a very blasé attitude sneaking in regarding the production of air-dried sausage and meats.
The, “Well they’ve been doing it for centuries in Italy/Spain etc without sophisticated equipment” brigade, and the, “Well they have them hanging in bars in Italy/Spain, so they must be safe” camp.
What they say may be true but we do not have the same conditions as those people, nor do we have the accumulated knowledge of generations of forebears on our side so we need to be cautious in what we do for reasons that I hope will become clear.
By the way, the meat above the bar abroad will be perfectly safe – once the meat has dried sufficiently bacteria won’t live in it – but only after it’s dried, not during its production.
Anyone wanting to read in detail about the safeguards needed when air drying meat or sausage will find some of the best information available here.
In this summary we can see that we need to protect against the growth of bacteria by:
Using meats with a low bacteria count. We can’t assess this at home but can:
Buy the freshest meat and keep it cold.
keep our tools and work environment clean.
keep the meat as cold as possible when making the product.
Cure the meat properly
Adding the correct amount of salt.
Using sodium nitrite and nitrate which protect against Clostridium botulinum, the most toxic poison known.
Increase the acidity of the meat to discourage bacterial growth – lower the PH
Using a starter, or other methods, to increase acidity and produce beneficial bacteria.
Reduce the amount of water available for bacteria to breed – lower water activity (Aw)
By careful drying at the correct temperature and humidity
Smoking the meat, which also dries it and provides surface protection against bacteria may also be used.
The first of these hurdles I hope is self-explanatory; if you don’t feel that it’s necessary maybe you should take up skydiving instead of sausage-making!
The second has caused much debate recently with scares about the use of nitrite and nitrate but we also know that salt alone will not protect against Clostridium botulinum unless used at unpalatable levels. The scares have mainly been related to meat cooked at high temperatures and given that the amounts of nitrite/nitrate used in modern recipes are lower than those naturally occurring in many vegetables, my opinion is that they should be used. The advantages far outweigh the disadvantages.
Increasing the acidity – lowering the PH of the meat – is generally done by producing lactic bacteria in the meat. In sausage, the addition of a small amount of glucose will assist this process as will the use of a commercially produced lactic bacteria starter. This is usually combined with an incubation/fermentation period at a high temperature and humidity. Ingredients such as wine and vinegar, in some sausages, will assist.
Drying the meat sounds easy but should be done in a specific environment. Many people dry it outside during the cooler parts of the year and this is fine but given the fluctuations in temperature we have been getting in recent years, it’s not always as safe as it once was. What is needed is a temperature of around 12°C – 15°C. We also want a Relative Humidity (RH) of between 60% and 85% (depending on the type of product) and some airflow. We need to achieve an environment where the meat dries steadily: not too fast, not too slow. Drying too fast or dry can lead to a problem with ‘case hardening’ where the outside dries before moisture can escape from the middle leading to a spoiled, or at least, an inferior product
It’s a while since I’ve done any sausage-making, what with trying to convert a bedroom into a work space and not feeling too good. We really need to make a trip to buy meat but in the meantime, I raided the freezer to make some hot dogs.
“Hot-dogs”, you ask, “Why would you want to make horrible fast food?”. Well, my dear reader, there’s a vast difference between what you buy on a Friday night when the clubs close and a good homemade hot dog in a quality bun; ask any American! They virtually have wars over there as to which style is the best!
This is an adaption of the tutorial that I wrote on ‘beginners’ bacon curing for the sausagemaking.org forum.
Let’s Make Bacon!
Cure suppliers
Details of cures and suppliers can be found on this page.
Cleaning/Hygiene
Pay attention to hygiene; keep everything clean and safe. Ensure work surfaces and cutting boards are clean. You may wish to use plastic gloves when handling curing salts.
Choice, Size and Source of Meat
Your meat can be from the supermarket, local butcher, or direct from the farm-shop or farm. You can cure as much or as little as you want. Remember though, the better the meat: the better the bacon. For this reason, many people choose rare-breed or free-range meat. However, for your first project, a joint from the supermarket is fine. If something goes wrong it won’t have cost you the earth!
You’ll need:
For Streaky Bacon – a boned joint of belly pork For Back Bacon – a boned joint of loin of pork
In the supermarket, both of these are likely to be rolled and tied with string. Remove any string and unroll the meat. It should be noted that the rashers from these joints are smaller than those of commercial bacon as smaller pigs are used.
The Dry Cure
For this guide, we will pretend we are dry curing a piece of meat weighing 1930gm (1.93kg/4.24lb).
The sugar can be one of your choosing white, brown, Demerara or even honey or maple syrup. The darker the sugar: the stronger the flavour. A mixture of white and Demerara, or light brown sugar, makes tasty mild bacon.
Weigh your piece of meat and calculate the amount of cure you need…
If you have accurate scales:
For our 1930gm (1.93kg) example, that’s: Salt 22gm x 1.93kg = 42.5gm Sugar 8gm x 1.93kg = 15.4gm Cure #1 – 2.4gm x 1.93kg = 4.6gm Sodium ascorbate 0.4gm x 1.93kg = 0.77gm
You can add any herbs and spices you fancy. A sprinkle of black pepper and thyme keeps things simple.
If you don’t have accurate scales:
Make up a batch of cure: Salt 220gm Sugar 80gm Cure #1 – 24gm Sodium ascorbate 4gm (optional)
Now, ensuring it’s well mixed (you could grind it in a clean coffee grinder, if you have one, to make sure) use 33gm per kg meat. So in this case that would be 33gm x 1.93kg = 63.69gm (64gm to make it easier to weigh).
You can add any herbs and spices you fancy. A sprinkle of black pepper and thyme keeps things simple.
For easy calculation for all weights of meat use one of my online calculators:
For My Favourite Bacon – the moderately salted bacon that’s featured above. Or, alternatively, this very Mild Bacon Or, make up your own cure – this calculator will help you to do it safely: Bacon Cure Calculator
The amount of cure mix may seem a lot less than you expected. Don’t add more, that’s how it’s meant to be.
Sprinkle about 80% – 90% of the cure mix onto the flesh side of the meat and rub well in, getting into all the folds and crevices. Don’t forget the ends. The remainder is sprinkled onto the skin/fat side and rubbed in well.
Now put the meat, along with any cure that fell off whilst you were rubbing it in, into a food grade bag, or wrap it well in cling film. In fact it’s easier to put the meat into the bag and then rub the cure into it! Put it into the fridge; on a tray’s best, just in case it leaks. Every day or two turn it over and give it a bit of a rub; you can do this ‘through’ the bag without opening it. Don’t worry if liquid comes out of the meat. It often, but not always, does. Just leave it all in the bag.
How Long Do I Leave It For?
The standard advice is to cure the meat for 1 day for each ½ inch (13mm) of thickness, plus two days. So for a piece of supermarket belly like ours, about 1½ (39mm) inches deep, thats going to be 3 days + 2 days = 5 days total. Don’t lose sleep about the curing times. Unlike older curing methods, this type of cure is not time-critical, it won’t be too salty if you leave it longer than the calculated time so it’s always best to err on the side of caution. If in doubt leave it a little longer. You may notice, because you’re bound to take a peek, that it doesn’t appear to have changed colour. That’s normal. The outside colour is deceiving. If you’ve followed the instructions it’ll be lovely red bacon when you cut into it.
Wash and Dry
At the end of the curing time, rinse the bacon in cold water, then dry it with a clean cloth or paper towel. It then needs to dry out a bit before use. It’s best hung in the fridge, but this can sometimes be difficult. If you can’t hang it, put it where the air can get around it; maybe on the fridge shelf with something underneath to catch any drips. Leave it for at least a couple of days to dry; I tend to leave it longer as I prefer it well dried. When your impatience gets the better of you, slice it, cook it, and enjoy!
Storing Your Bacon
This is not ‘old-style traditional bacon’ that can be hung in the rafters all winter. Keep it in the fridge for up to a few weeks, or for longer storage freeze it whole, or in slices, for 1 to 2 months. If you Vac-Pac it, you can keep it longer but it must be kept under 5°C or frozen.